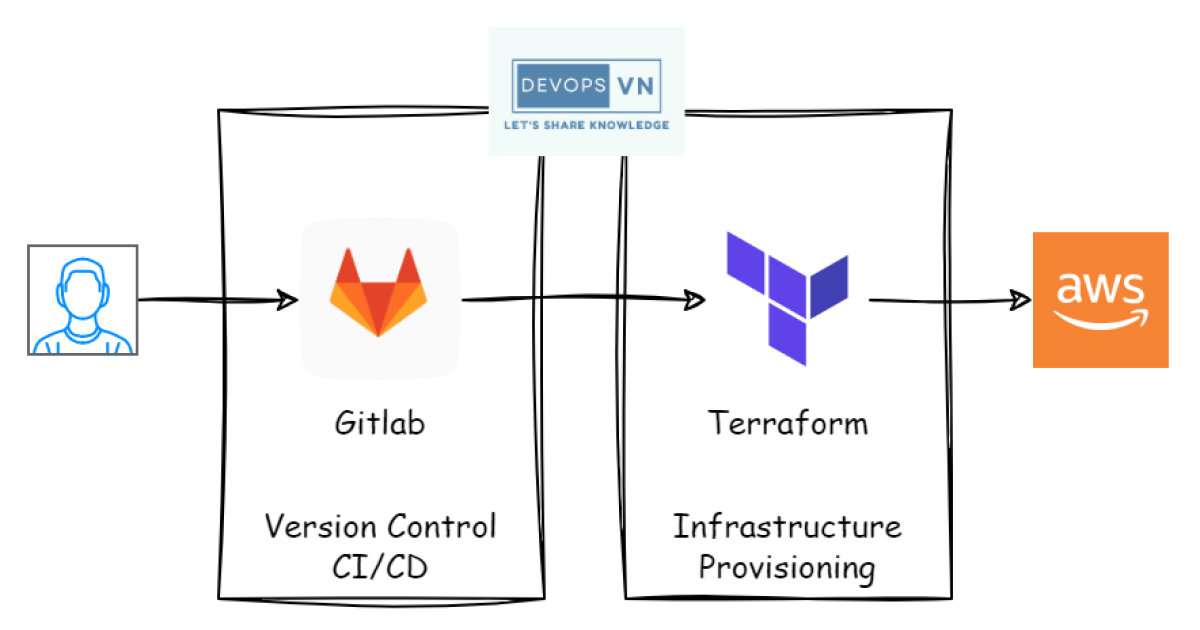
In this part we’ll learn how to use GitLab CI to build a CI/CD flow for Terraform.
GitLab CI is a wonderful feature of GitLab that supports many CI/CD cases. To do this part you need a GitLab account. We’ll do a simple example of creating an EC2 on AWS via GitLab CI.
GitLab CI
First, create a GitLab repository with these 3 files:
.gitlab-ci.ymlmain.tfvariables.tf
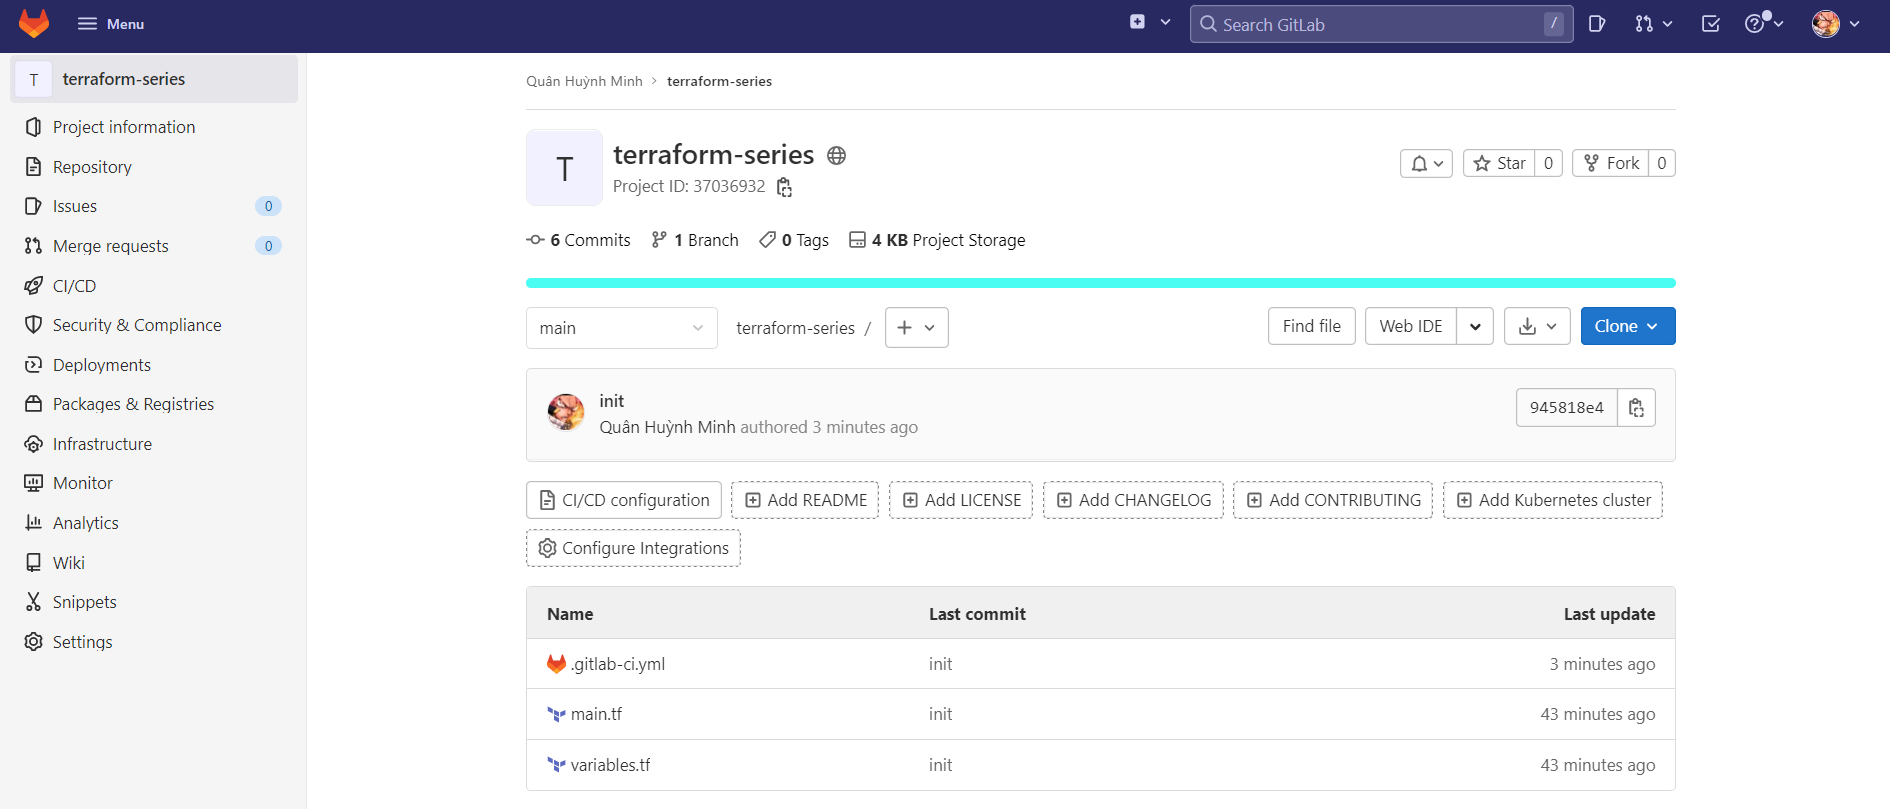
The code for variables.tf and main.tf.
variable "region" {
  default = "us-west-2"
}

variable "instance_type" {
  default = "t3.micro"
}
terraform {
  required_version = ">= 1.9"

  required_providers {
    aws = {
      source  = "hashicorp/aws"
      version = "~> 6.0"
    }
  }
}

provider "aws" {
  region = var.region
}

data "aws_ami" "ami" {
  most_recent = true
  owners      = ["amazon"]

  filter {
    name   = "name"
    values = ["al2023-ami-2023.*-x86_64"]
  }

  filter {
    name   = "virtualization-type"
    values = ["hvm"]
  }
}

resource "aws_instance" "server" {
  ami           = data.aws_ami.ami.id
  instance_type = var.instance_type

  tags = {
    Name = "Server"
  }
}
Above is simple code to create an EC2 on AWS. The important file we need to study in this part is .gitlab-ci.yml, the file containing the instructions for the CI/CD flow.
stages:
  - plan
  - apply

image:
  name: hashicorp/terraform:1.11
  entrypoint:
    - "/usr/bin/env"
    - "PATH=/usr/local/sbin:/usr/local/bin:/usr/sbin:/usr/bin:/sbin:/bin"

cache:
  paths:
    - .terraform.lock.hcl
    - terraform.tfstate

before_script:
  - terraform init

plan:
  stage: plan
  script:
    - terraform plan -out "planfile"
  artifacts:
    paths:
      - planfile

apply:
  stage: apply
  script:
    - terraform apply -input=false "planfile"
  dependencies:
    - plan
  when: manual
I’ll explain some important parts of the .gitlab-ci.yml file above. For more, see GitLab CI. Note that we pin the image to hashicorp/terraform:1.11 instead of the floating latest tag so the pipeline is reproducible.
GitLab Stages
stages:
  - plan
  - apply
This defines how many stages GitLab CI needs to run (you can name them anything); above we specify it needs to run two stages, plan and apply. Within each stage we define the commands GitLab CI executes. We call each stage a Job.
Configuring the default image
Next we configure all jobs to run in the hashicorp/terraform image.
image:
  name: hashicorp/terraform
  entrypoint:
    - "/usr/bin/env"
    - "PATH=/usr/local/sbin:/usr/local/bin:/usr/sbin:/usr/bin:/sbin:/bin"
Init
Then we use before_script to init the resources needed to run Terraform.
before_script:
  - terraform init
Plan
Next we run plan to preview the resources that will be created.
plan:
  stage: plan
  script:
    - terraform plan -out "planfile"
  artifacts:
    paths:
      - planfile
The artifacts section is used to export files we need to pass from this job to another.
Apply
Finally, the apply section is where we create the resources.
apply:
  stage: apply
  script:
    - terraform apply -input=false "planfile"
  dependencies:
    - plan
  when: manual
Since apply is an important step, we add the when: manual attribute. This tells GitLab CI that this stage needs to be triggered manually.
Cache
To save the Terraform State we use the cache.paths attribute.
cache:
  paths:
    - .terraform.lock.hcl
    - terraform.tfstate
Note: in practice you should use an S3 backend to store the Terraform State (with use_lockfile = true for S3-native locking, so concurrent pipeline runs can’t corrupt state). See the S3 Backend part to understand better: Part 8 - Using the S3 Standard Backend in a Project.
Executing GitLab CI
We commit and push the code to GitLab. Go to GitLab and open the CI/CD section.
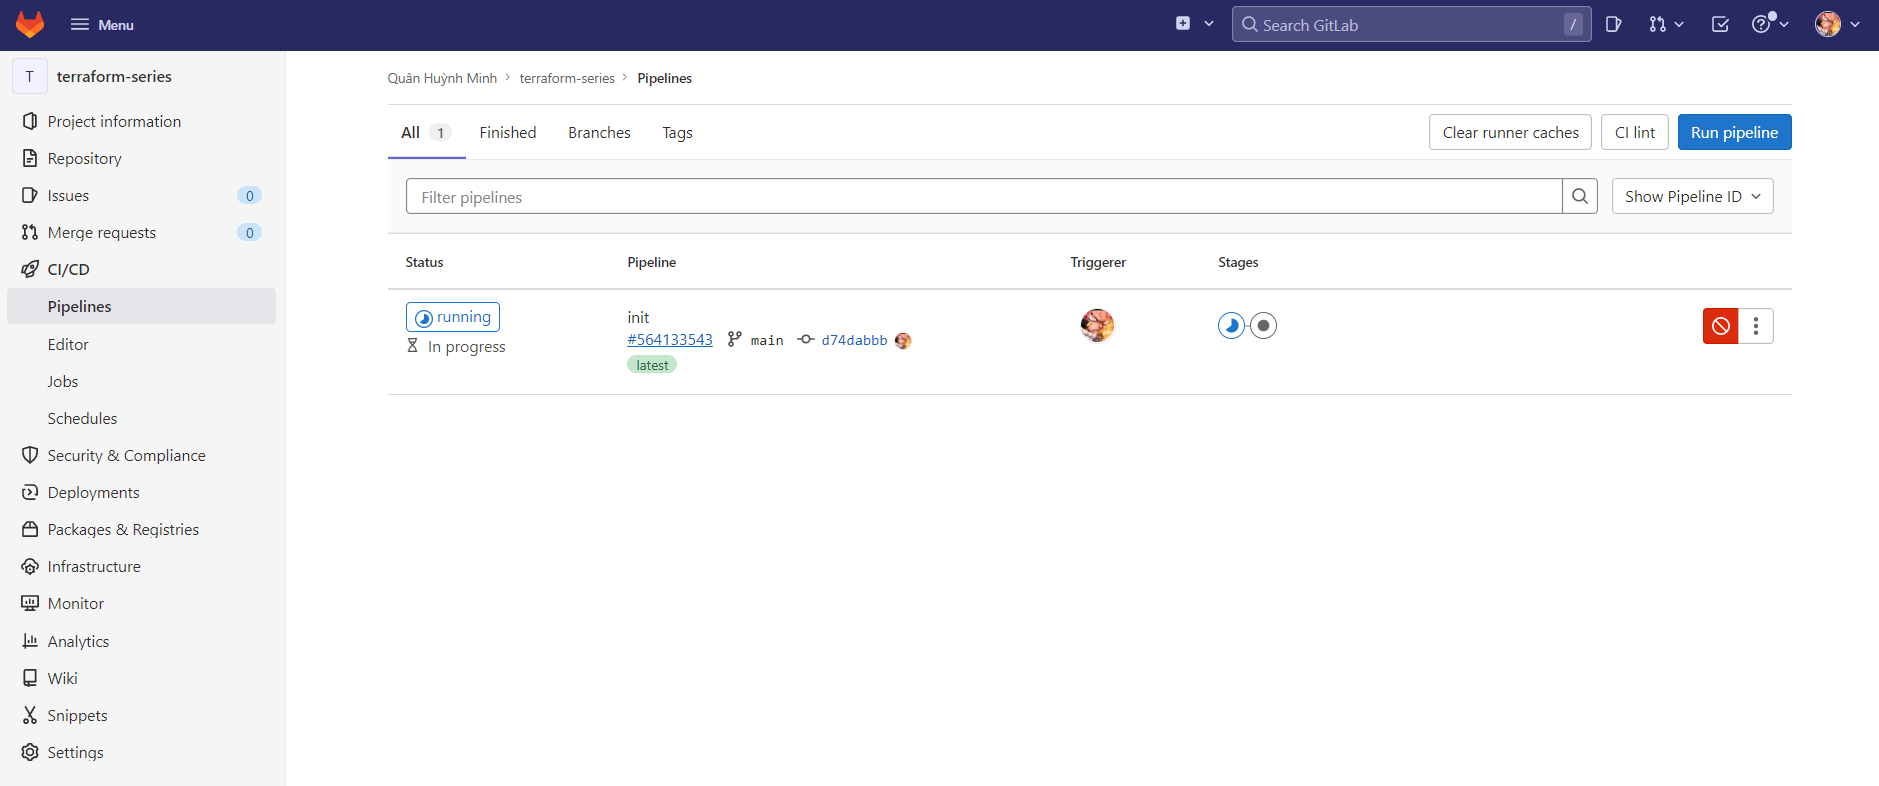
We’ll see our pipeline failed; click over to the Job section to check why.
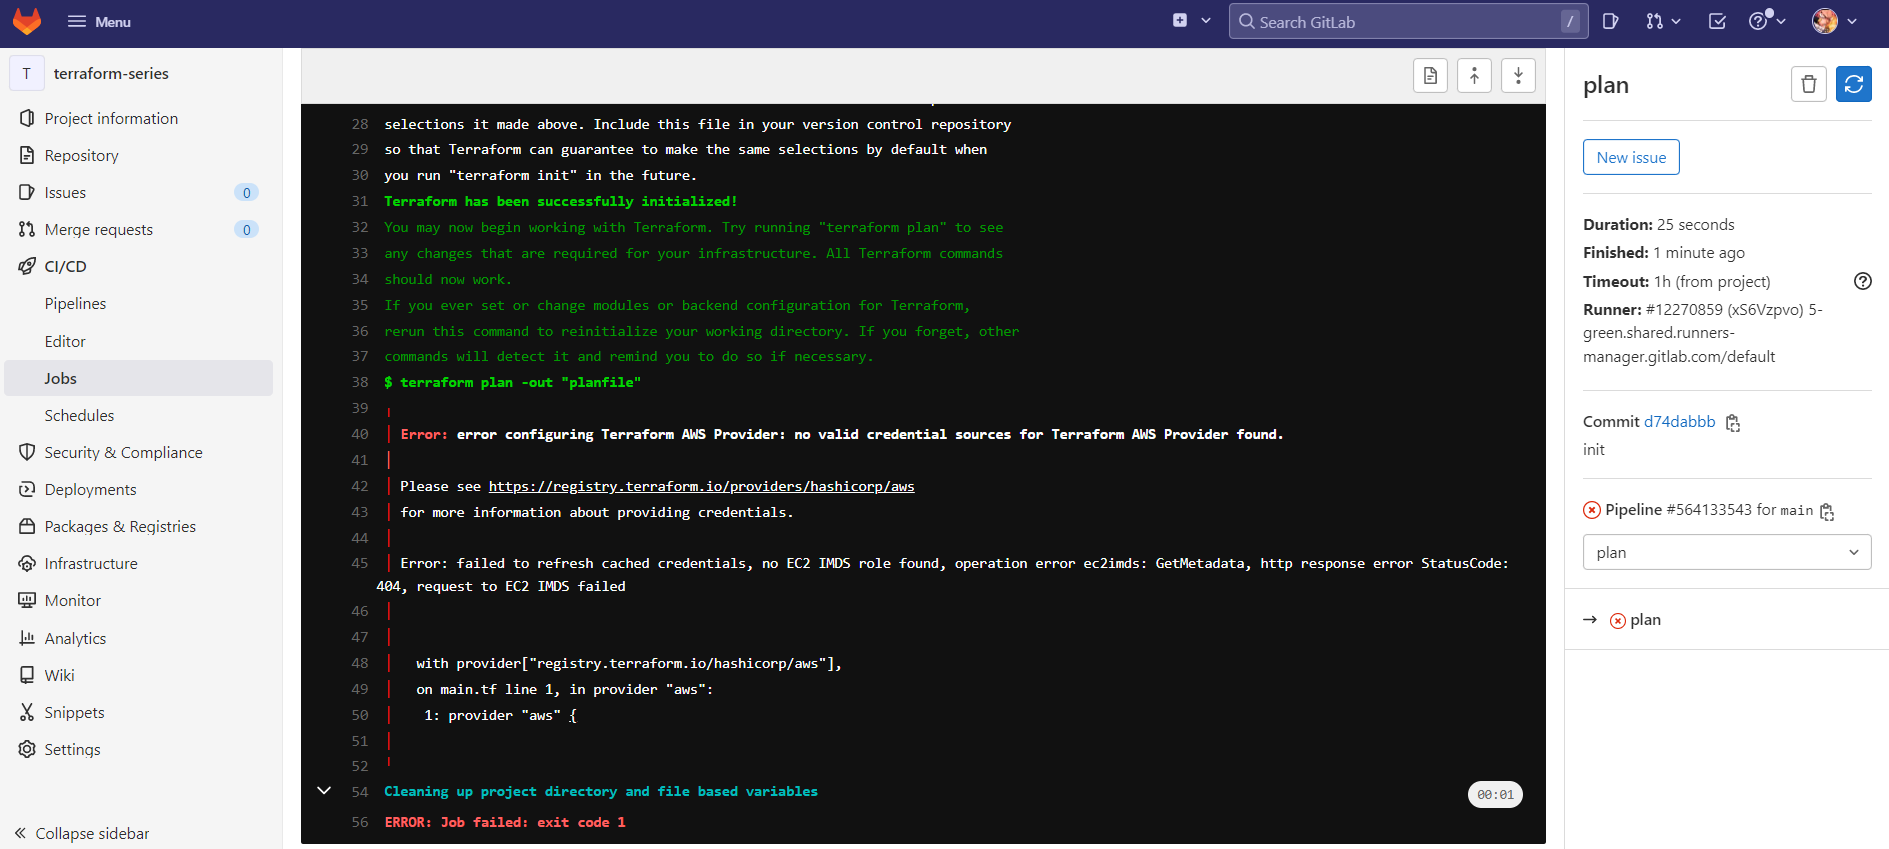
These are the logs GitLab CI prints.
$ terraform plan -out "planfile"
╷
│ Error: error configuring Terraform AWS Provider: no valid credential sources for Terraform AWS Provider found.
│
│ Please see https://registry.terraform.io/providers/hashicorp/aws
│ for more information about providing credentials.
│
│ Error: failed to refresh cached credentials, no EC2 IMDS role found, operation error ec2imds: GetMetadata, http response error StatusCode: 404, request to EC2 IMDS failed
│
│
│   with provider["registry.terraform.io/hashicorp/aws"],
│   on main.tf line 1, in provider "aws":
│    1: provider "aws" {
│
╵
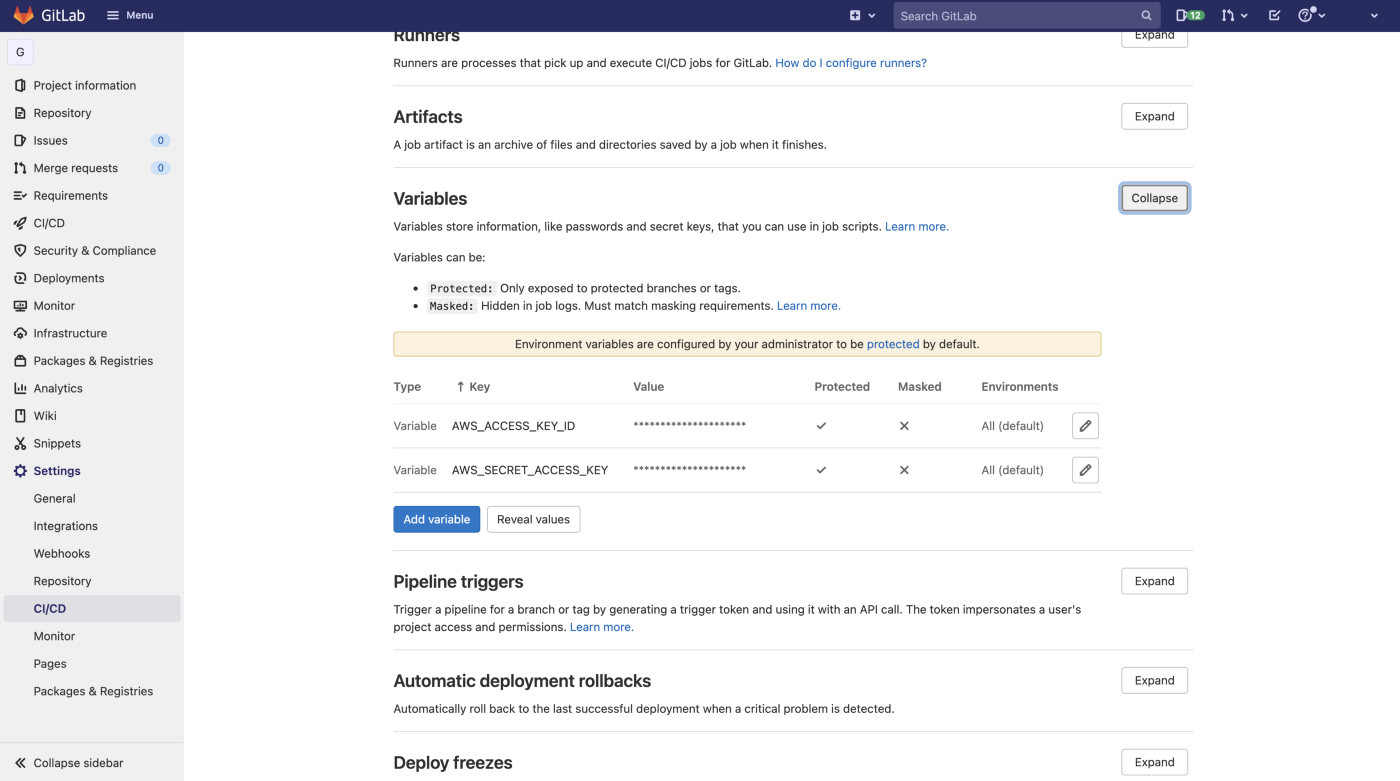
This error is because we haven’t configured AWS credentials. Create an IAM User with Administrator permission following the guide here: IAM User Admin. Then create an Access Key and Secret Key, and configure those values into two environment variables, AWS_ACCESS_KEY_ID and AWS_SECRET_ACCESS_KEY.
Go to Settings -> CI/CD, scroll down to the Variables section, and add the two variables above.
Run the pipeline again and we’ll see it succeed. Next is the apply step, which is currently in manual mode and waiting for us to trigger it.
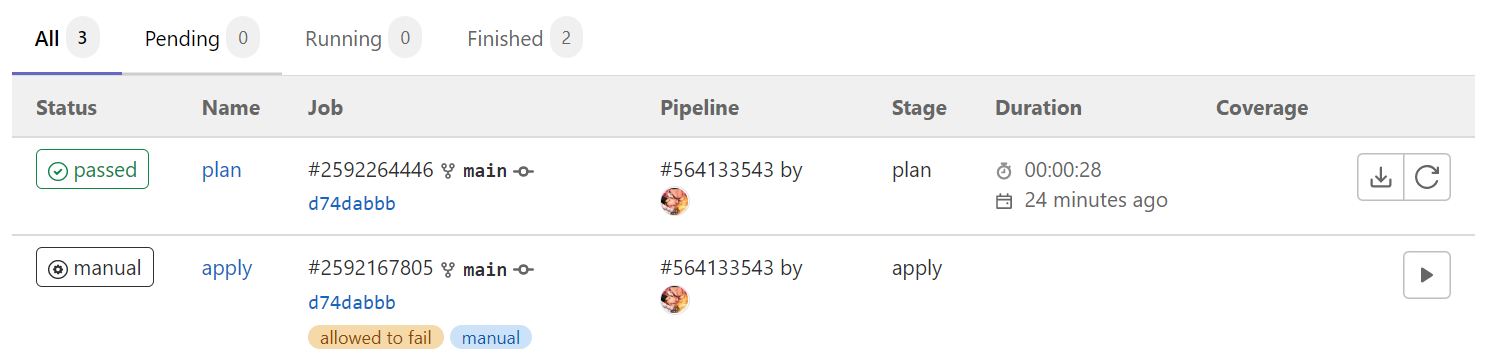
We manually trigger GitLab CI to run the apply step.
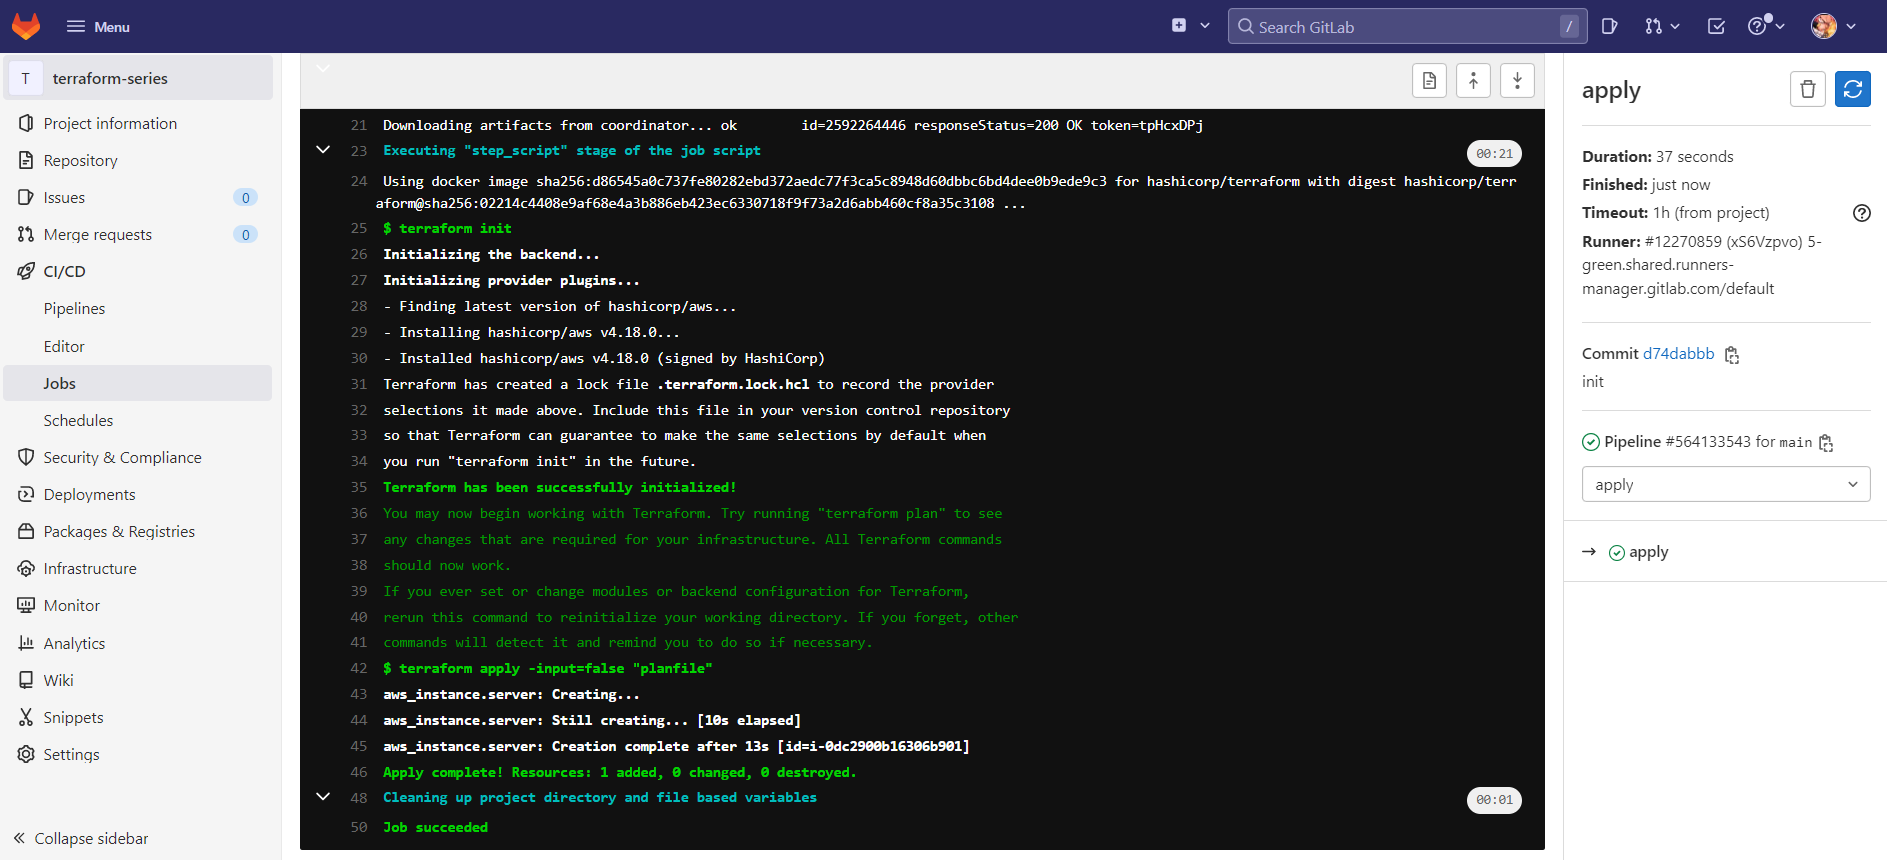
So we’ve successfully performed CI/CD for Terraform with GitLab CI.
Organizing environments
In practice we usually split a repository into multiple branches, and each branch is deployed to a specific environment.
For example, we have two environments, dev and pro; the dev branch deploys to the dev environment, and the pro branch deploys to the pro environment. How do we do that with Terraform?
Terraform Workspaces
Workspaces are a Terraform feature that lets us store multiple different Terraform states on the same source code. This means we can use one source code to deploy to multiple environments, instead of having to create a separate source code for each environment.
Each workspace uses different variables to create different infrastructure, which is why we should use variables for attributes that can change depending on the environment.
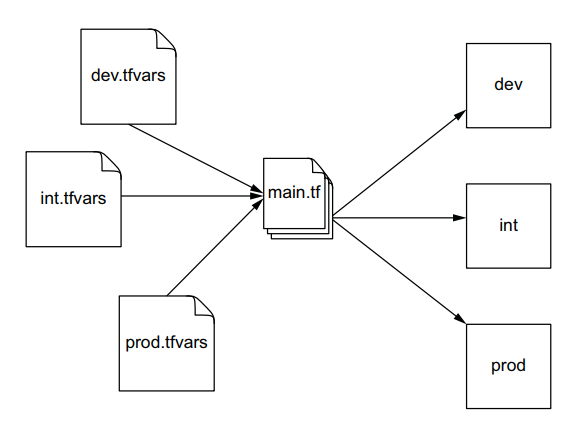
For the example above.
resource "aws_instance" "server" {
  ami           = data.aws_ami.ami.id
  instance_type = var.instance_type

  tags = {
    Name = "Server"
  }
}
Instead of hard-coding the instance_type value, we should put it in a variable.
Workspaces
When we run terraform init, Terraform already creates a workspace named default for us. List all current workspaces:
terraform workspace list
* default
To create a new workspace we run terraform workspace new <name>, for example creating the dev and pro workspaces:
terraform workspace new dev
terraform workspace new pro
Run workspace list again:
terraform workspace list
* default
  dev
  pro
When we run new, Terraform creates a directory terraform.tfstate.d, which contains two subdirectories, dev and pro.
.
├── main.tf
├── terraform.tfstate.d
│   ├── dev
│   └── pro
└── variables.tf
These two subdirectories are where Terraform stores the state files for the different workspaces. To switch between workspaces, we use the select command:
terraform workspace select dev
Switched to workspace "dev".
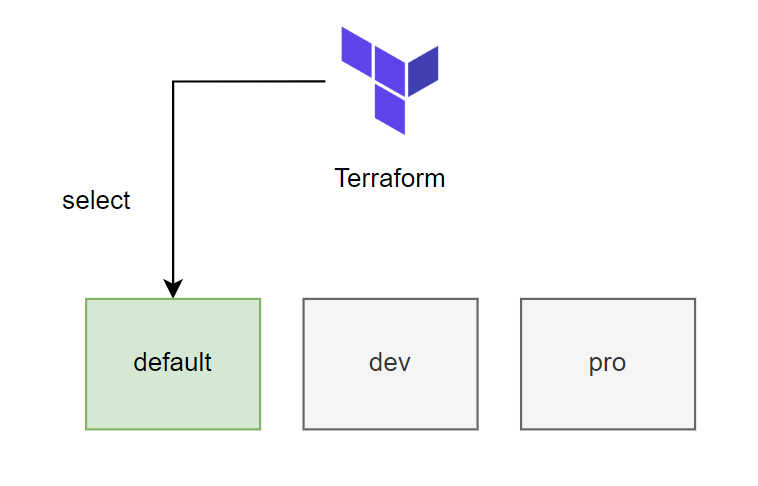
After organizing workspaces, how do we apply the correct variable for each specific environment?
Multiple environments
We can do that by passing the -var-file option when running apply, for example.
terraform apply -var-file=dev.tfvars -auto-approve
Next we apply workspaces to GitLab CI; first create two branches, dev and pro.
Important: remember to configure the dev and pro branches as protected.
Then we create a folder named env and two files, dev.tfvars and pro.tfvars.
region        = "us-west-2"
instance_type = "t3.micro"
region        = "ap-southeast-1"
instance_type = "t3.small"
Next, to be able to push the two empty subdirectories in terraform.tfstate.d to GitLab, we add a .gitkeep file. The current directory structure.
.
├── .gitlab-ci.yml
├── env
│   ├── dev.tfvars
│   └── pro.tfvars
├── main.tf
├── terraform.tfstate.d
│   ├── dev
│   │   └── .gitkeep
│   └── pro
│       └── .gitkeep
└── variables.tf
Then we update .gitlab-ci.yml as follows:
stages:
  - plan
  - apply

image:
  name: hashicorp/terraform:1.11
  entrypoint:
    - "/usr/bin/env"
    - "PATH=/usr/local/sbin:/usr/local/bin:/usr/sbin:/usr/bin:/sbin:/bin"

cache:
  paths:
    - .terraform.lock.hcl
    - terraform.tfstate.d/*

before_script:
  - terraform init
  - terraform workspace select -or-create "$CI_COMMIT_REF_NAME"

plan:
  stage: plan
  script:
    - terraform plan -var-file=env/$CI_COMMIT_REF_NAME.tfvars -out "planfile"
  artifacts:
    paths:
      - planfile
  only:
    - dev
    - pro

apply:
  stage: apply
  script:
    - terraform apply -input=false "planfile"
  dependencies:
    - plan
  when: manual
  only:
    - dev
    - pro
Now when you merge code into the dev branch, GitLab CI runs and deploys infrastructure for the dev environment, and similarly for the pro environment.
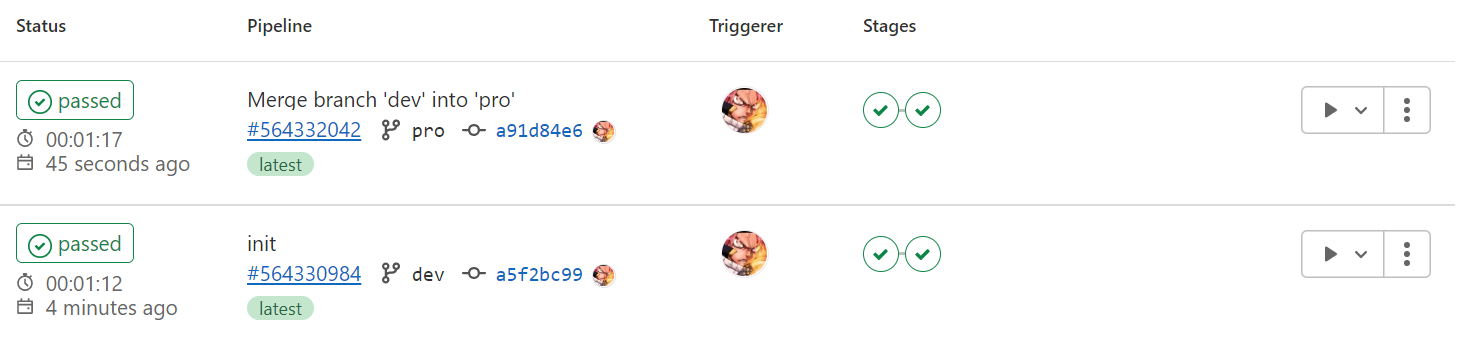
Reminder: in practice you should use an S3 backend to store the Terraform State.
I’ve split the two parts into two separate GitLab repositories so you can easily reference them.
- https://gitlab.com/hoalongnatsu/terraform-series
- https://gitlab.com/hoalongnatsu/terraform-series-workspace
Conclusion
So we’ve learned how to use GitLab CI with Terraform. GitLab CI is a popular CI/CD tool widely used for building CI/CD for Terraform.