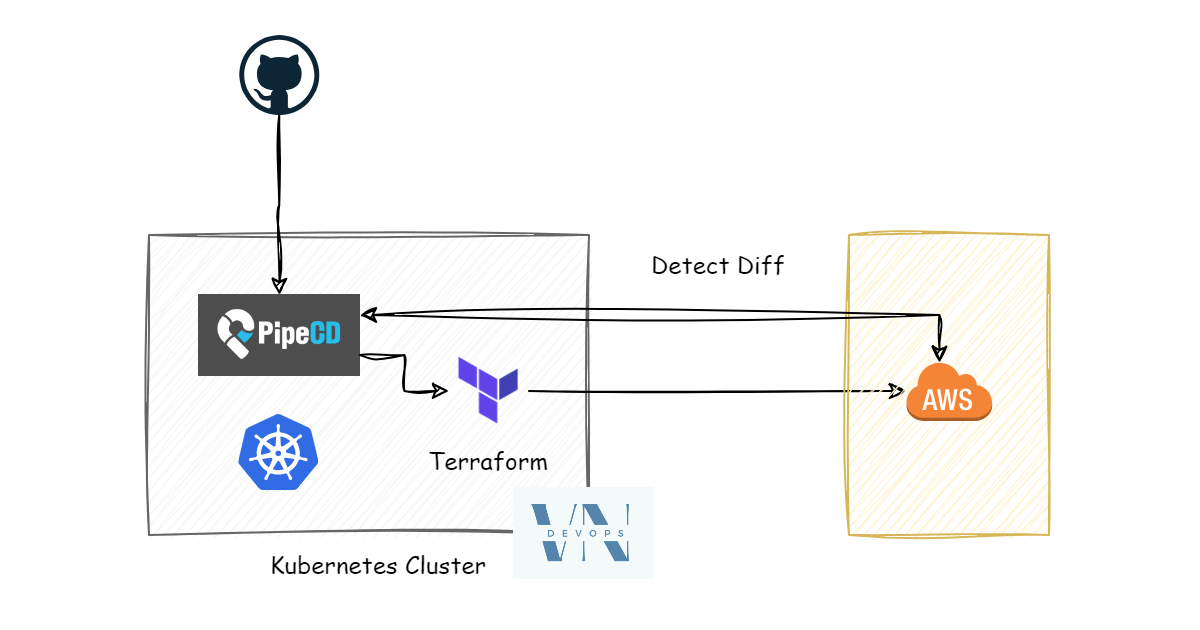
GitOps is a term that has been mentioned a lot in recent years. A popular GitOps tool is ArgoCD, which helps us deploy the GitOps model on Kubernetes. However, cloud native isn’t only Kubernetes — there are many other environments such as AWS, GCP, and Azure. In this post we’ll explore a tool that helps us deploy the GitOps model across many different environments: PipeCD. We’ll do an example with PipeCD + Terraform and AWS.
GitOps
Here’s a simple explanation of GitOps. Imagine this common scenario. We have a system and everything is running fine. Management and everyone are happy. Then one day the system stops working. Management is upset, yells at the whole team, and demands we find the cause.
After losing sleep for several days and nights, you discover the bug: someone changed the database configuration so the current app can no longer connect to the database. You fix it and ask who did it — and no one admits it. This is a very familiar story that happens every day.
GitOps was created to help minimize this problem. With GitOps, our system has two parts:
- The current state
- The state we desire
The desired state is defined by declarative configuration files for the system, and Git is where we store these files. GitOps is the process of syncing the system’s current state to match the desired state stored in Git.
Now, any change to the system is made through Git. If anyone wants to change the configuration, they have to edit the code and create a pull request into Git. We have full control over the desired system state and know who made each change.
GitOps doesn’t require any specific tool — it just needs tools that provide the following capabilities:
- Connect to Git to track the desired state stored in Git
- Detect the difference between the current state and the desired state
- Sync the current state to match the desired state
In this post we’ll use Terraform and PipeCD to deploy the GitOps model on AWS.
Terraform
We use Terraform to declare infrastructure on AWS. We’ll do a simple example: declare an EC2 configuration in Terraform code and store it in GitHub. Then we use PipeCD to connect to GitHub and sync the EC2 configuration stored in Git to the actual AWS infrastructure.
Go to GitHub and create a new repo cloned from this repo:
pipecd. We need a
Terraform Backend
for this post. Move into the backend directory and run:
terraform init && terraform apply -auto-approve
Apply complete! Resources: 11 added, 0 changed, 0 destroyed.

Outputs:

config = {
  "bucket" = "pipecd-s3-backend"
  "dynamodb_table" = "pipecd-s3-backend"
  "region" = "ap-southeast-1"
  "role_arn" = "arn:aws:iam::111937018111:role/PipecdS3BackendRole"
}
The code we use for GitOps in this post is in the terraform directory. Copy the
result above and update the bucket, dynamodb_table, and role_arn values in
main.tf:
terraform {
  backend "s3" {
    bucket         = ""
    key            = "pipecd"
    region         = "ap-southeast-1"
    encrypt        = true
    role_arn       = ""
    dynamodb_table = ""
    shared_credentials_files = ["/etc/piped-secret/credentials"]
  }
}

provider "aws" {
  region = "ap-southeast-1"
  shared_credentials_files = ["/etc/piped-secret/credentials"]
}

data "aws_ami" "ubuntu" {
  most_recent = true

  filter {
    name   = "name"
    values = ["ubuntu/images/hvm-ssd/ubuntu-focal-20.04-amd64-server-*"]
  }

  owners = ["099720109477"] # Canonical Ubuntu AWS account id
}

resource "aws_instance" "ubuntu" {
  ami           = data.aws_ami.ubuntu.id
  instance_type = "t2.micro"

  tags = {
    Name = "Hello PipeCD"
  }
}
Next, we install PipeCD.
PipeCD
PipeCD has two components: the Control Plane and Piped.
Install the Control Plane
The PipeCD Control Plane
is a main component of the PipeCD system; it manages all the Piped agents (the
agents that run the sync process). In the basic case, you only need to install a
single Control Plane to manage the Piped agents. In this post we’ll use Helm to
install the PipeCD Control Plane on a Kubernetes cluster. Create a file
piped-values.yaml:
config:
  data: |
    apiVersion: "pipecd.dev/v1beta1"
    kind: ControlPlane
    spec:
      datastore:
        type: MYSQL
        config:
          url: root:test@tcp(pipecd-mysql:3306)
          database: quickstart
      filestore:
        type: MINIO
        config:
          endpoint: http://pipecd-minio:9000
          bucket: quickstart
          accessKeyFile: /etc/pipecd-secret/minio-access-key
          secretKeyFile: /etc/pipecd-secret/minio-secret-key
          autoCreateBucket: true
      projects:
        - id: quickstart
          staticAdmin:
            username: hello-pipecd
            passwordHash: "$2a$10$ye96mUqUqTnjUqgwQJbJzel/LJibRhUnmzyypACkvrTSnQpVFZ7qK" # bcrypt value of "hello-pipecd"
mysql:
  database: quickstart
  image: mysql
  rootPassword: test
quickstart:
  enabled: true
secret:
  encryptionKey:
    data: encryption-key-just-used-for-quickstart
  minioAccessKey:
    data: quickstart-access-key
  minioSecretKey:
    data: quickstart-secret-key
Run Helm:
helm upgrade -i pipecd oci://ghcr.io/pipe-cd/chart/pipecd --version v0.44.2 --create-namespace --namespace=pipecd -f piped-values.yaml
After installation, run the following command to open the PipeCD Console:
kubectl -n pipecd port-forward svc/pipecd 8080
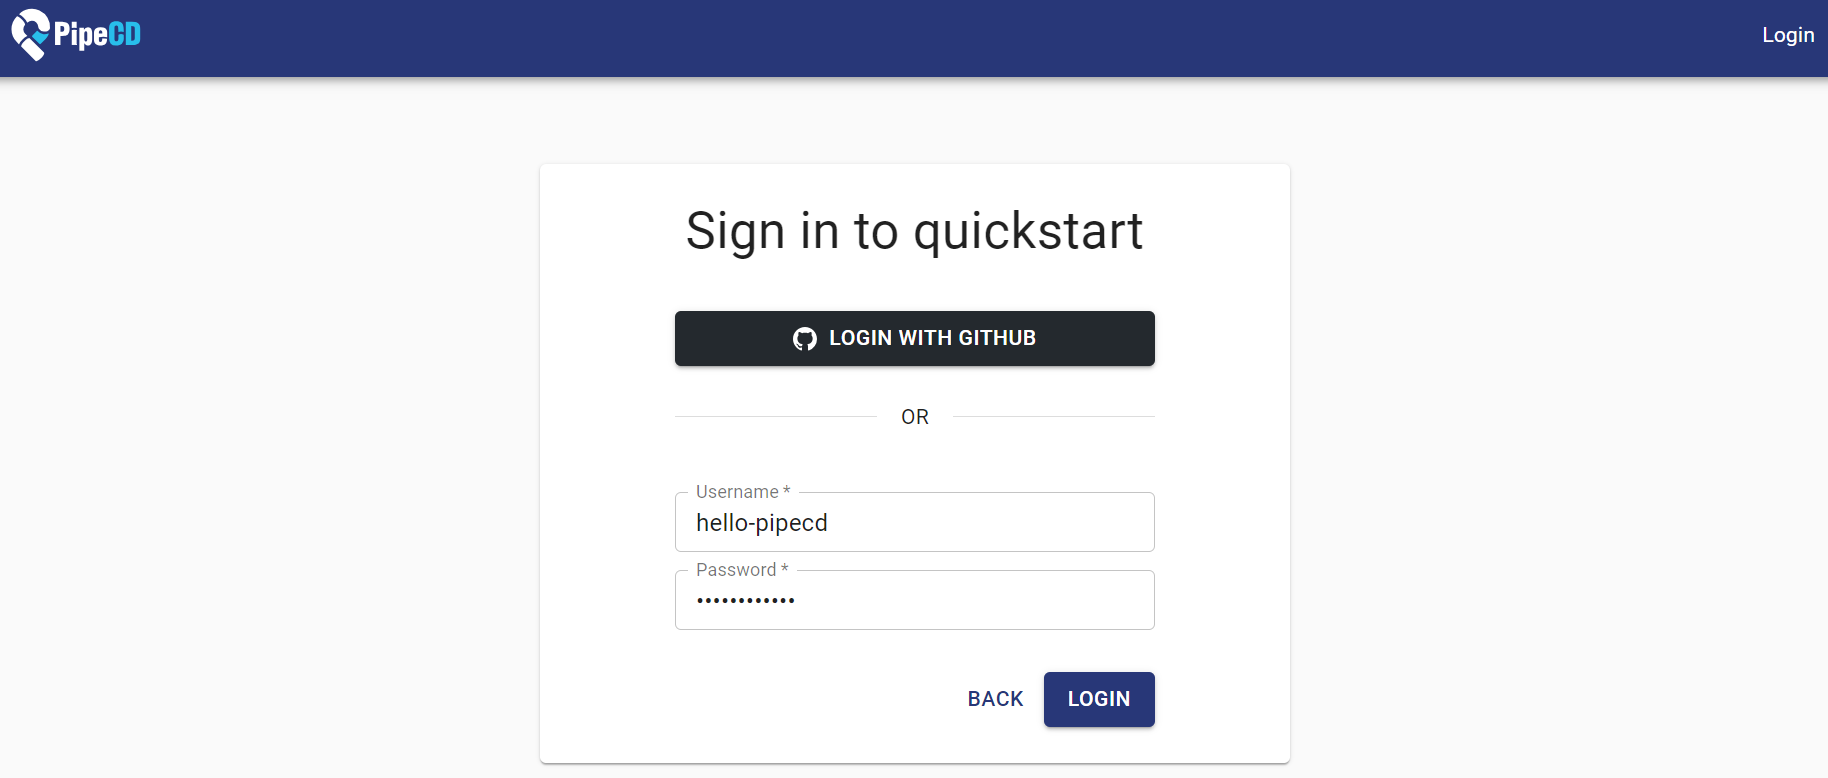
Open localhost:8080 in a browser and log in with the username and password
hello-pipecd.
On the PipeCD Console, go to Settings > Piped and click +ADD to create a key.
Enter the Piped’s name and description.
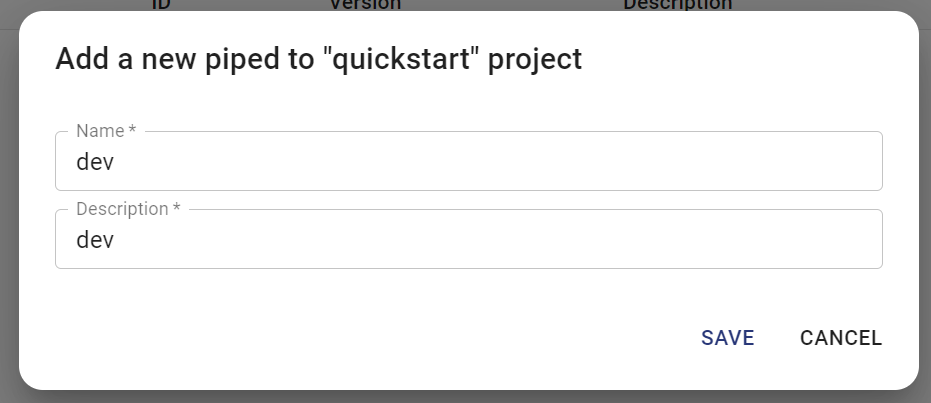
Click SAVE.
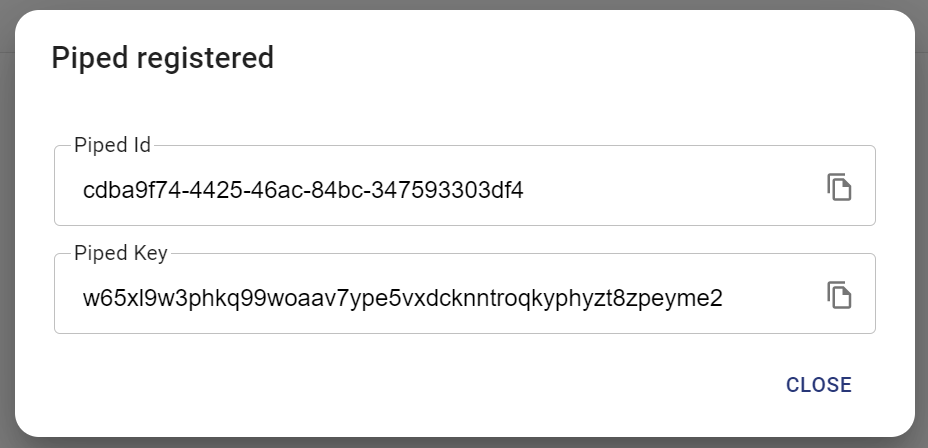
Remember to copy the Piped Id and Piped Key.
Connect to GitHub
Next we create a Piped to connect to GitHub. Create a piped-values.yaml file:
config:
  data: |
    apiVersion: pipecd.dev/v1beta1
    kind: Piped
    spec:
      projectID: quickstart
      pipedID: <pipe-id>
      pipedKeyFile: /etc/piped-secret/piped-key
      syncInterval: 1m
      apiAddress: pipecd:8080
      repositories:
        - repoId: pipecd
          remote: https://github.com/hoalongnatsu/pipecd.git
          branch: main
      platformProviders:
        - name: terraform
          type: TERRAFORM

args:
  insecure: true

secret:
  data:
    piped-key: <pipe-key>
Update <pipe-id> and <pipe-key> with the values you created above. Run Helm:
helm upgrade -i dev oci://ghcr.io/pipe-cd/chart/piped --version=v0.44.2 --namespace=pipecd -f piped-values.yaml
After connecting to GitHub, the next thing we need to do is specify the directory containing the Terraform configuration so PipeCD can sync it to AWS. To do this, we’ll create an Application.
Application
On the PipeCD Console, go to Application and click +ADD. Choose ADD MANUALLY.
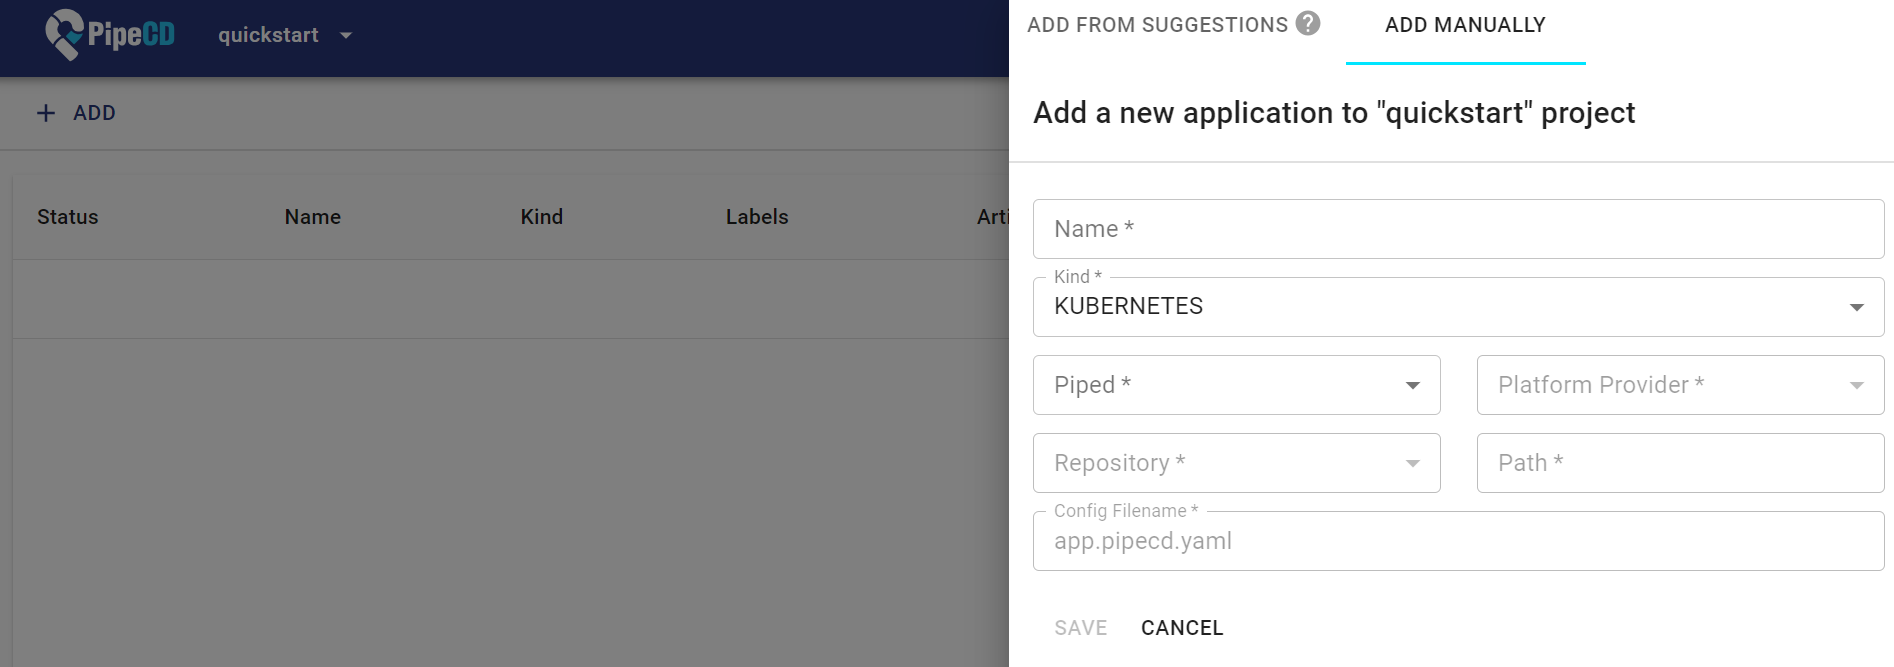
Fill it in as follows:
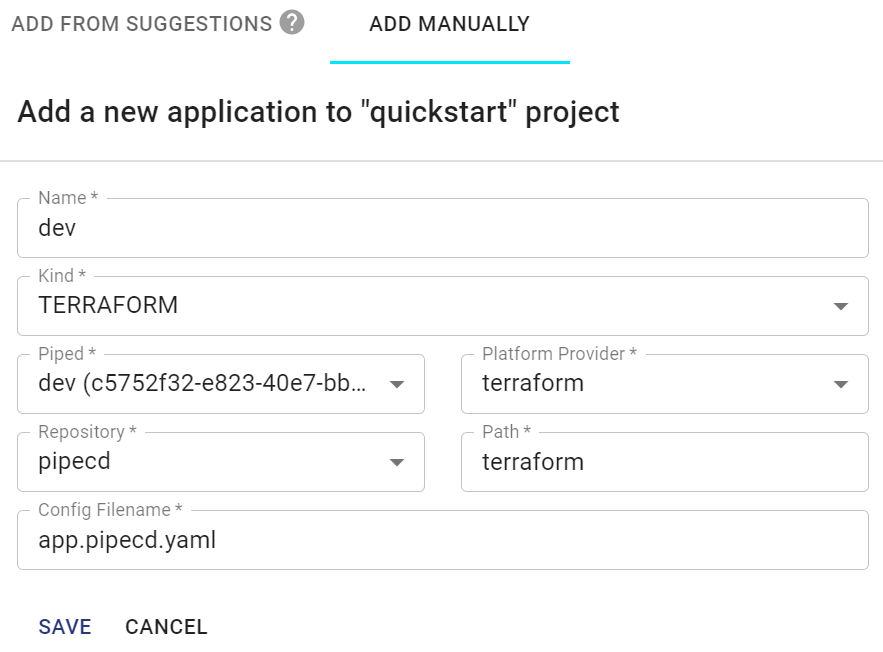
Then click SAVE and PipeCD will start syncing. Switch to Deployments and you’ll
see the sync in progress. However, after waiting a while, it reports an error:
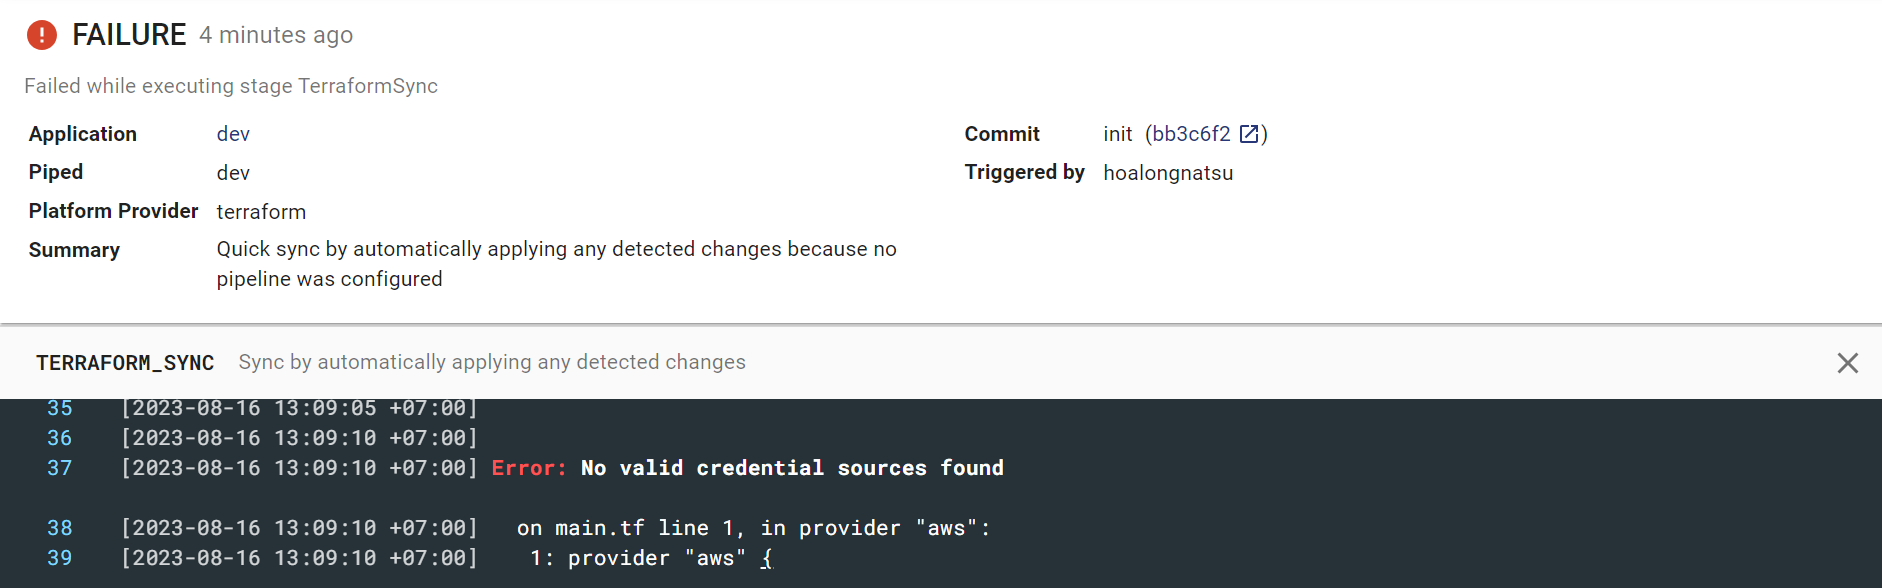
Specifying AWS Credentials
The reason is that we haven’t configured AWS credentials to tell PipeCD which AWS
account to deploy to. To configure credentials, edit the secret section of
piped-values.yaml:
...
secret:
  data:
    piped-key: t14hagknd38cjkdzrq5c9fdgma1h2cdsrsn72kk50jpzr74xcc
    credentials: |
      [default]
      aws_access_key_id=<access_key>
      aws_secret_access_key=<secret_key>
Update <access_key> and <secret_key> with your values. Then run helm again:
helm upgrade -i dev oci://ghcr.io/pipe-cd/chart/piped --version=v0.44.2 --namespace=pipecd -f piped-values.yaml
Note: this is only for demo purposes. For a real project, you should use secret management.
Back in Application, click the dev application and click SYNC:

Switch to Deployments and you’ll see PipeCD synced successfully.
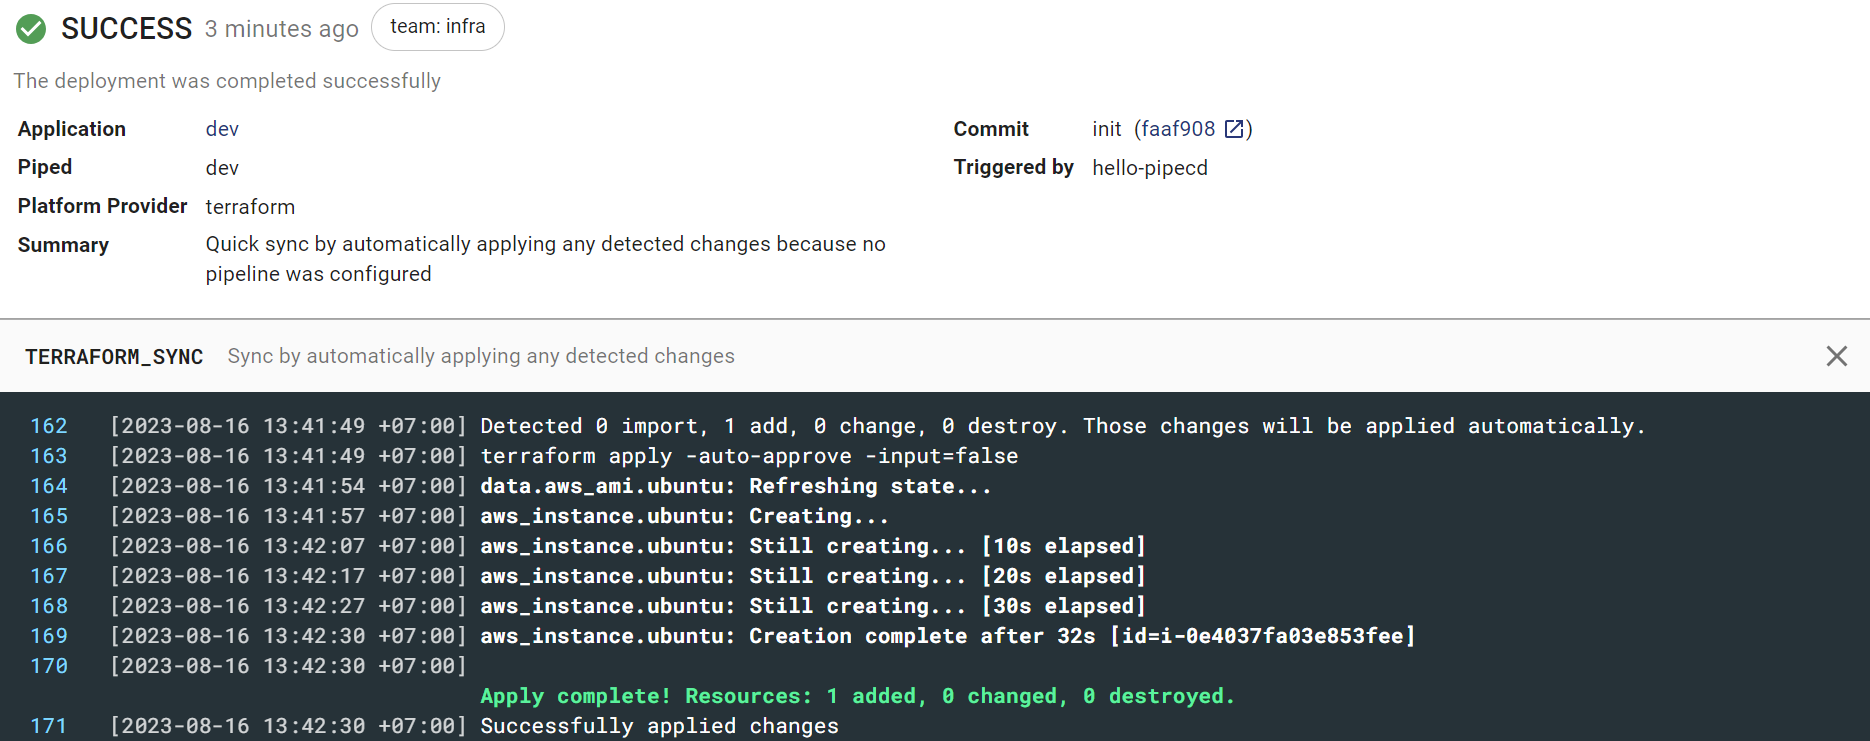
Check the AWS Console to see the newly created EC2.

If you change the EC2 configuration in the Console — for example, change the tag to
Hello:

PipeCD will automatically detect it and notify us.
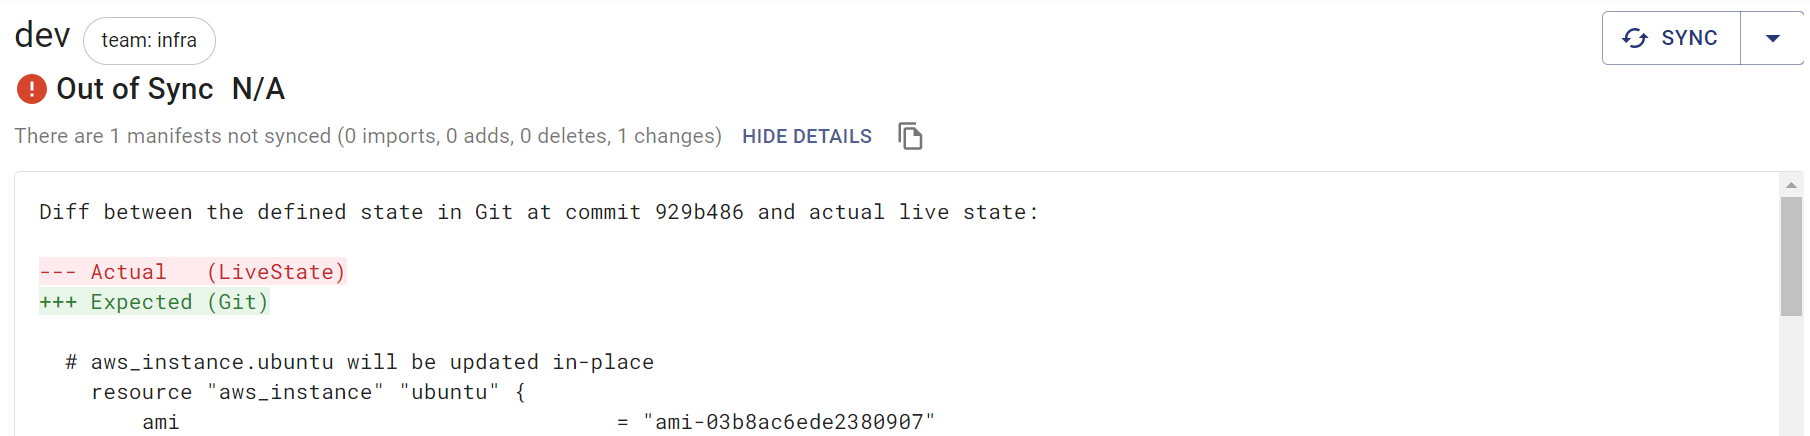
If we click SYNC, PipeCD will sync the EC2 configuration to match Git. This step
can be automated using the
DeploymentTrigger
property. But with Terraform we shouldn’t make this process automatic, as it’s
fairly dangerous.
Remember to delete all the resources after you finish practicing.
Conclusion
We’ve now covered how to deploy the GitOps model on AWS with PipeCD. The project is still under active development. Give it a try and share your feedback.