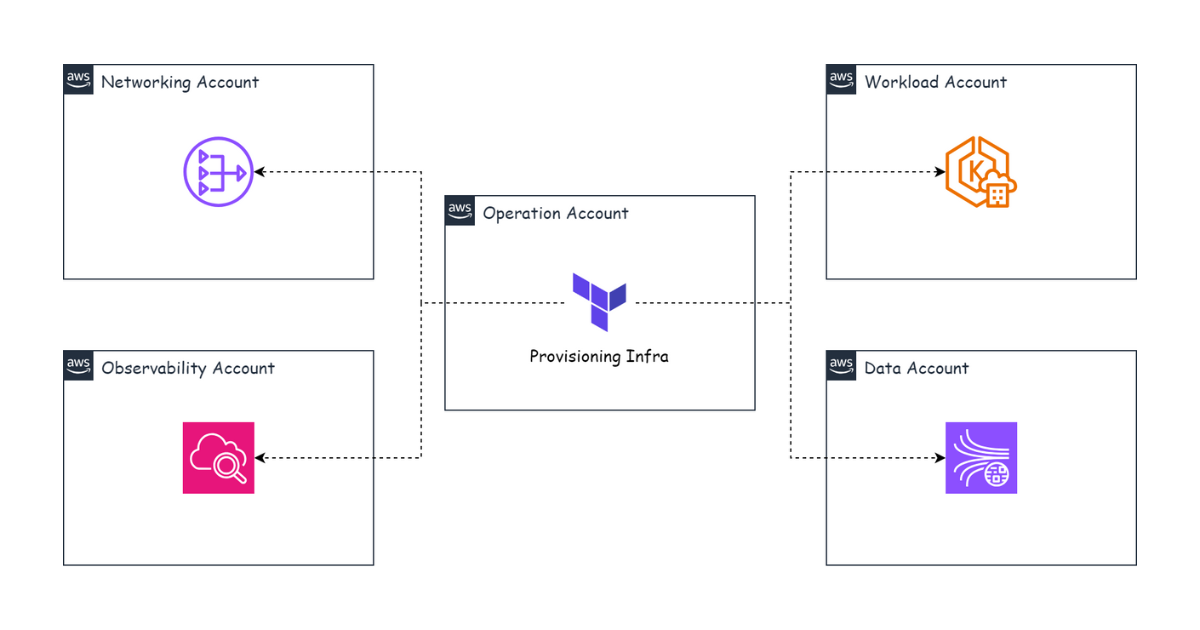
This part is about using Infrastructure as Code tools to provision infrastructure for the different AWS accounts that belong to a banking AWS Organization. A few important questions: Which IaC tool do we use? Should we create one Git repository or many to hold the IaC source code? How do we organize the project’s directory structure? And what does the provisioning flow look like?
Infrastructure as Code
To briefly explain: Infrastructure as Code is the practice of using source code to define and provision infrastructure instead of creating it manually in the AWS Console. For a large infrastructure, provisioning manually through the Console is very hard to manage and replicate across environments. In the case of banking infrastructure — which is both large and spread across many accounts — using IaC is absolutely necessary.
There are many IaC tools: Terraform, AWS CDK, Pulumi, and so on. We use Terraform, so I’ll describe how to use Terraform to provision infrastructure across multiple AWS accounts.
One Git repository or many?
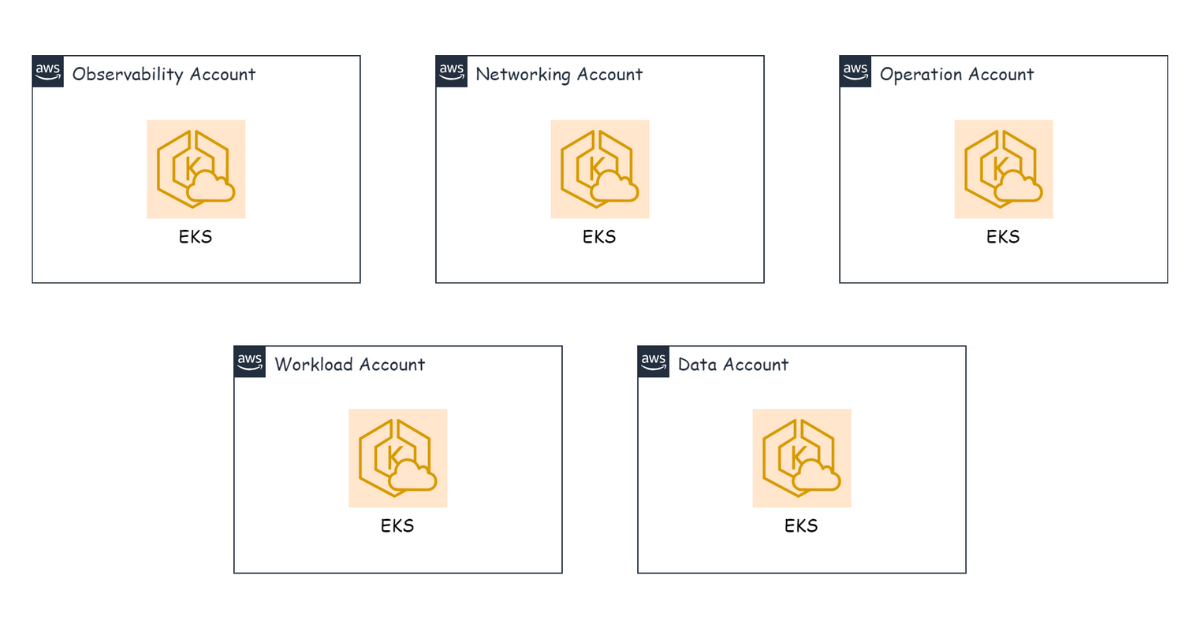
The accounts mentioned in the AWS Account Management part are named as follows:
- networking-nonprod
- workload-nonprod
- operation-nonprod
- observability-nonprod
- data-nonprod
- networking-prod
- workload-prod
- operation-prod
- observability-prod
- data-prod
Given the importance of the production environment, I suggest creating separate Git repositories for the nonprod and prod environments — for example: nonprod-terraform and prod-terraform.
Directory structure
Next, within each repository, we create a directory per account. If the nonprod environment has several sub-environments such as dev, uat, and staging, then inside each account directory we create an additional directory for each environment. An example structure:
└── nonprod-terraform
    ├── data-nonprod
    │   ├── dev
    │   └── uat
    ├── networking-nonprod
    │   ├── dev
    │   └── uat
    ├── observability-nonprod
    │   ├── dev
    │   └── uat
    ├── operation-nonprod
    │   ├── dev
    │   └── uat
    └── workload-nonprod
        ├── dev
        └── uat
Inside each environment directory we create a directory for each infrastructure component, such as vpc, eks, or rds:
└── nonprod-terraform
    ├── data-nonprod
    │   ├── dev
    │   │   ├── eks
    │   │   ├── rds
    │   │   └── vpc
    │   └── uat
    │       ├── eks
    │       ├── rds
    │       └── vpc
    ├── networking-nonprod
    │   ├── dev
    │   └── uat
    ├── observability-nonprod
    │   ├── dev
    │   └── uat
    ├── operation-nonprod
    │   ├── dev
    │   └── uat
    └── workload-nonprod
        ├── dev
        └── uat
When Terraform provisions infrastructure, it creates a state file that maps the source code to the actual infrastructure. This file is usually created on the machine you use to run Terraform. If you work alone, that’s fine — but when several people use the same source code to provision infrastructure, you need a mechanism to store the state file somewhere all team members can access when running Terraform. Terraform provides a mechanism called a Terraform Backend, which supports storing the state file in an AWS S3 bucket.
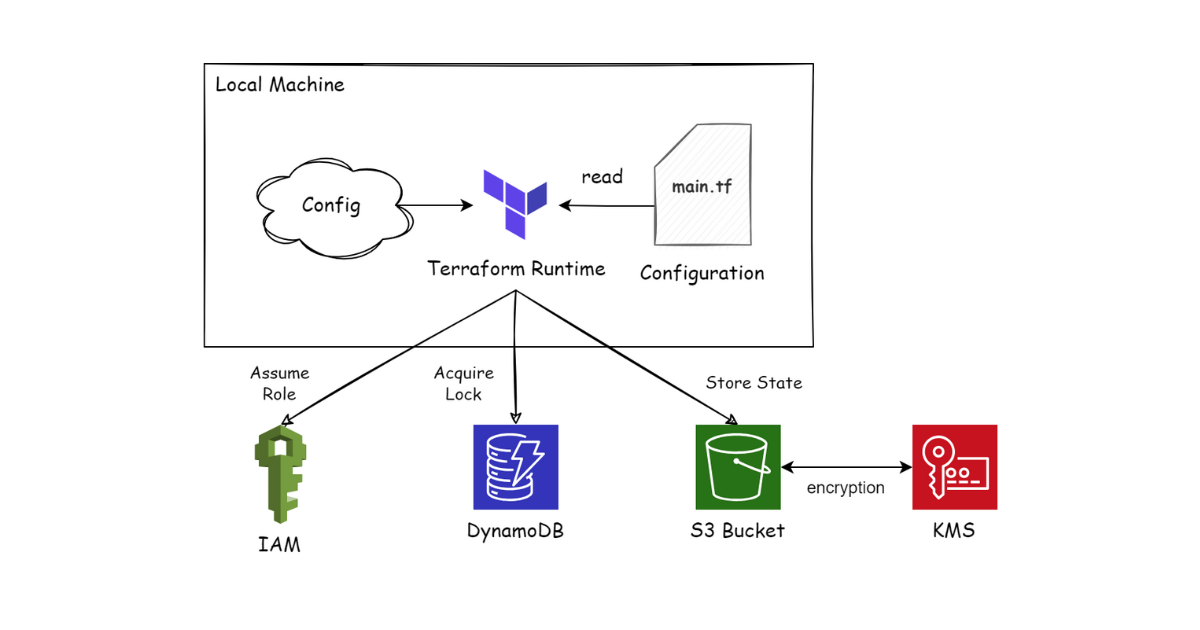
As mentioned in the previous part, the Operation account is used to run CI/CD and Terraform tasks. In this account we create an S3 bucket to store state files. This bucket stores the infrastructure state of the other accounts provisioned with Terraform. Here is an example of declaring a Terraform Backend to create a VPC in the data-nonprod account:
terraform {
  backend "s3" {
    bucket         = "nonprod-terraform-s3-backend"
    key            = "data-nonprod/dev/vpc"
    region         = "ap-southeast-1"
    encrypt        = true
    dynamodb_table = "nonprod-terraform-s3-backend"
  }
}
Note the key attribute — this is the path where the state file is stored, so name the key to match the directory of the component you want to create, for example the rds component in the data-nonprod account:
terraform {
  backend "s3" {
    bucket         = "nonprod-terraform-s3-backend"
    key            = "data-nonprod/dev/rds"
    region         = "ap-southeast-1"
    encrypt        = true
    dynamodb_table = "nonprod-terraform-s3-backend"
  }
}
The provisioning flow
To provision infrastructure, we run tasks from the Operation account. In the Operation account, we create an IAM Role with permissions to access S3, DynamoDB, and KMS. The purpose of this IAM Role is to store the infrastructure state files of other accounts into the S3 bucket.
After creating the IAM Role in the Operation account, we use the “Assume Role Cross Account” feature to obtain the credentials of another account. This lets us run provisioning tasks from the Operation account while using the permissions of the target account.
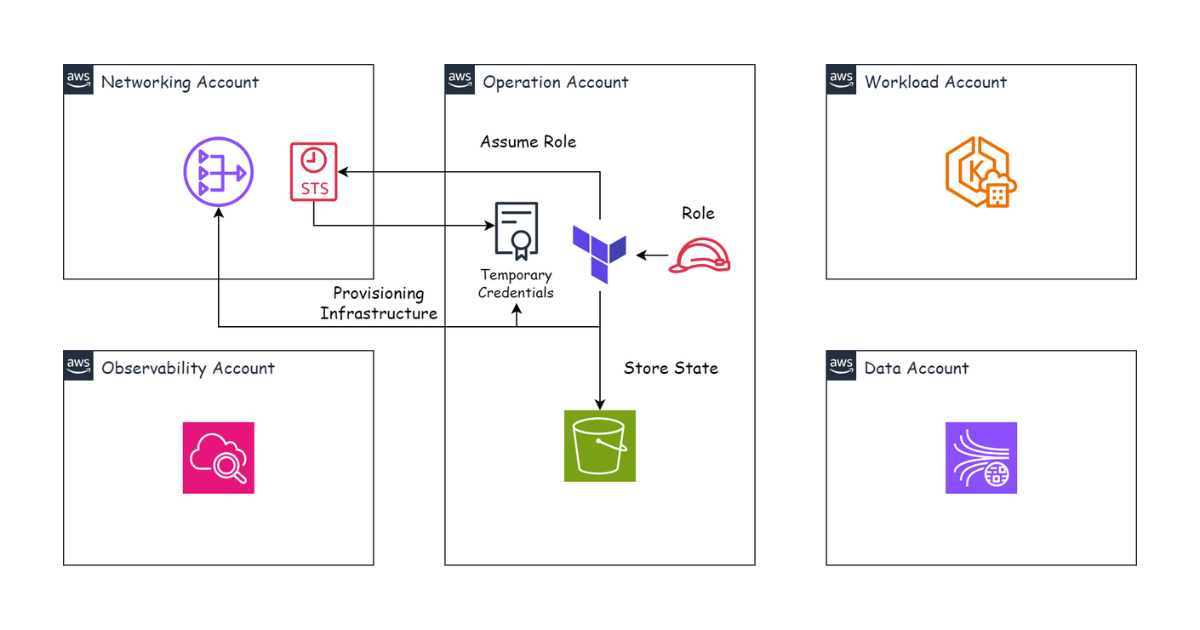
For example, in the Operation account we create an IAM Role named nonprod-terraform-operation. Before running Terraform, we use the Operation account’s user to run the following command to obtain a token:
export JSON=$(aws sts assume-role --role-arn arn:aws:iam::0123456789:role/nonprod-terraform-operation --role-session-name "execution")
export AWS_ACCESS_KEY_ID=$(echo ${JSON} | jq --raw-output ".Credentials[\"AccessKeyId\"]")
export AWS_SECRET_ACCESS_KEY=$(echo ${JSON} | jq --raw-output ".Credentials[\"SecretAccessKey\"]")
export AWS_SESSION_TOKEN=$(echo ${JSON} | jq --raw-output ".Credentials[\"SessionToken\"]")
This token has access to S3 in the Operation account (by default the token lasts 15 minutes). In addition, this token identifies a temporary user who has permission to assume roles in other accounts. For example, with the CLI command above, the temporary user created is named execution. That name is specified via the --role-session-name parameter in the aws sts assume-role command. The full ARN (Amazon Resource Name) looks like this:
arn:aws:sts::0123456789:assumed-role/nonprod-terraform-operation/execution
Next, in the other accounts, we create an IAM Role with just enough permissions to provision infrastructure there. Remember to grant only the minimum necessary permissions and follow AWS’s Security best practices in IAM. For example, in the data-nonprod account we create an IAM Role named nonprod-terraform-operation, and then we allow arn:aws:sts::0123456789:assumed-role/nonprod-terraform-operation/execution to assume that role.
Finally, in Terraform we declare the AWS Provider as follows, in the data-nonprod/dev/vpc directory:
terraform {
  backend "s3" {
    bucket         = "nonprod-terraform-s3-backend"
    key            = "data-nonprod/dev/vpc"
    region         = "ap-southeast-1"
    encrypt        = true
    dynamodb_table = "nonprod-terraform-s3-backend"
  }
}

provider "aws" {
  assume_role {
    role_arn = "arn:aws:iam::<data-nonprod-account-id>:role/nonprod-terraform-operation"
  }
}
Similarly for other accounts, for example networking-nonprod, in the networking-nonprod/uat/rds directory:
terraform {
  backend "s3" {
    bucket         = "nonprod-terraform-s3-backend"
    key            = "networking-nonprod/uat/rds"
    region         = "ap-southeast-1"
    encrypt        = true
    dynamodb_table = "nonprod-terraform-s3-backend"
  }
}

provider "aws" {
  assume_role {
    role_arn = "arn:aws:iam::<networking-nonprod-account-id>:role/nonprod-terraform-operation"
  }
}
For convenience, the token-fetching steps can be automated through CI/CD. When the pipeline runs, we run a script to detect which directories changed, then step into those directories to run Terraform. For example, when using GitHub Actions, we can use the tj-actions/changed-files action to determine the changed directories.
In the next part, I’ll talk about networking for multiple AWS accounts.