In the previous part we learned about the Remote Backend with Terraform Cloud. In this part we’ll learn how to use Terraform Cloud to build CI/CD for infrastructure. Then we’ll learn about a Terraform attribute that helps us perform zero-downtime deployment.
Terraform Cloud was renamed HCP Terraform in 2023. It’s the same product — the screenshots below still say “Terraform Cloud,” but the workflow is identical.
CI/CD with Terraform Cloud
As we said in the previous part, when we create a workspace on Terraform Cloud there are three ways:
- Version Control System workflow (VCS): building CI/CD
- CLI-driven workflow: building a Remote Backend
- API-driven workflow
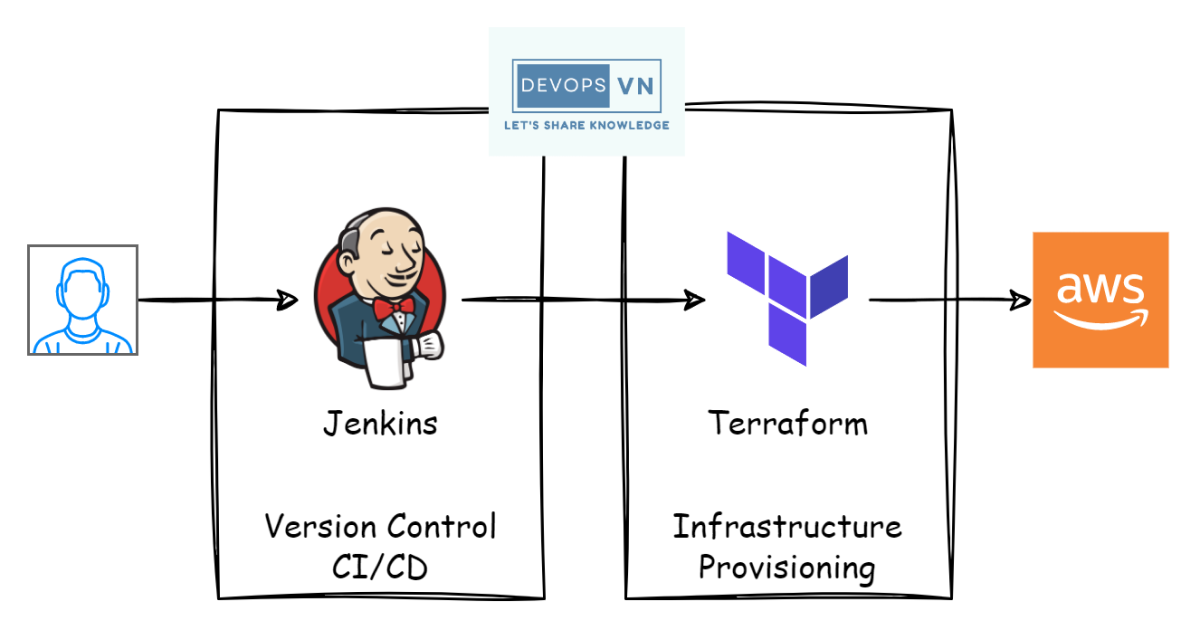
With Terraform Cloud VCS, building CI/CD is very easy. All we need to do is create a GitHub repository, connect it to Terraform Cloud, then just push code to GitHub, and Terraform Cloud performs the entire CI/CD flow for us.
Creating a GitHub repository
First, create a repository on GitHub. This is my repository for this example: https://github.com/hoalongnatsu/terraform-cloud-vcs-example.
Then log into Terraform Cloud — for how to register an account and configure AWS credentials, see the previous part. The screen after logging into Terraform Cloud.

Creating a VCS workspace
On the Workspaces page, click New Workspace, then choose Version control workflow.
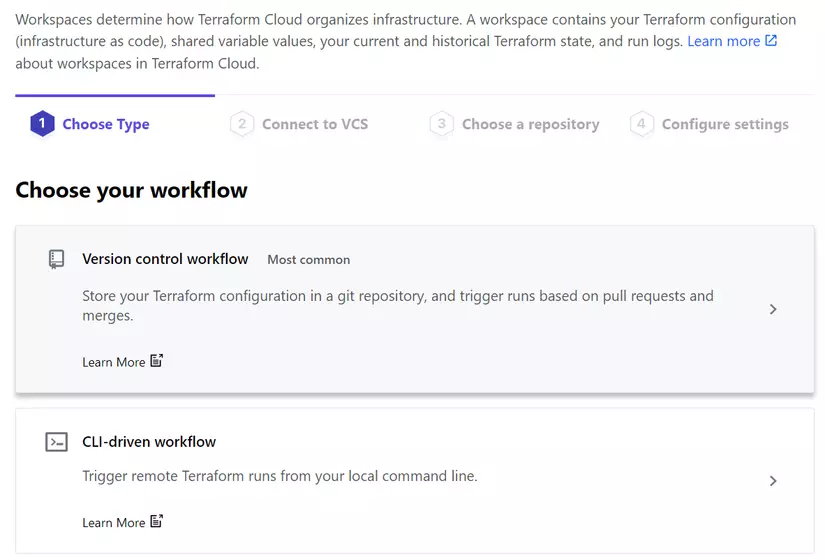
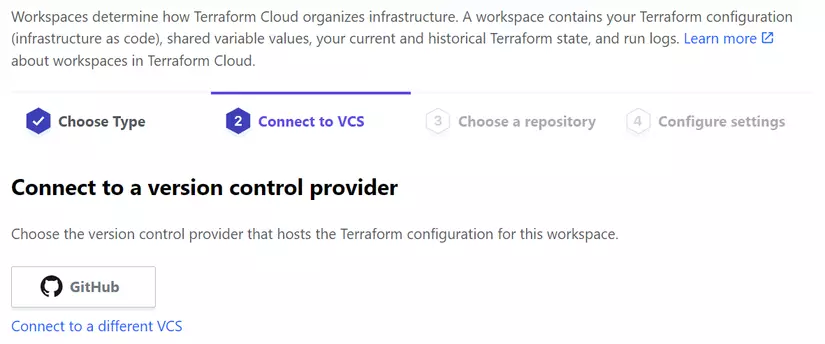
In the next step, at Connect to a version control provider, click the GitHub icon.
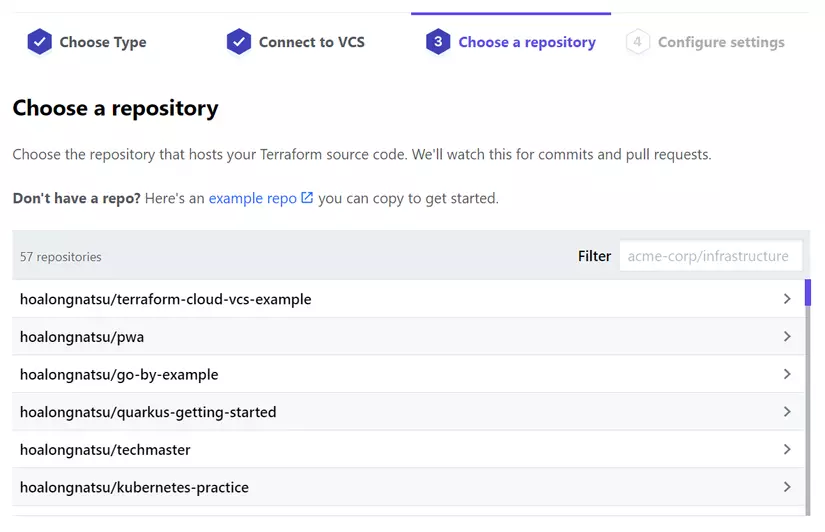
Next, choose the repository you created for this example; mine is named terraform-cloud-vcs-example.
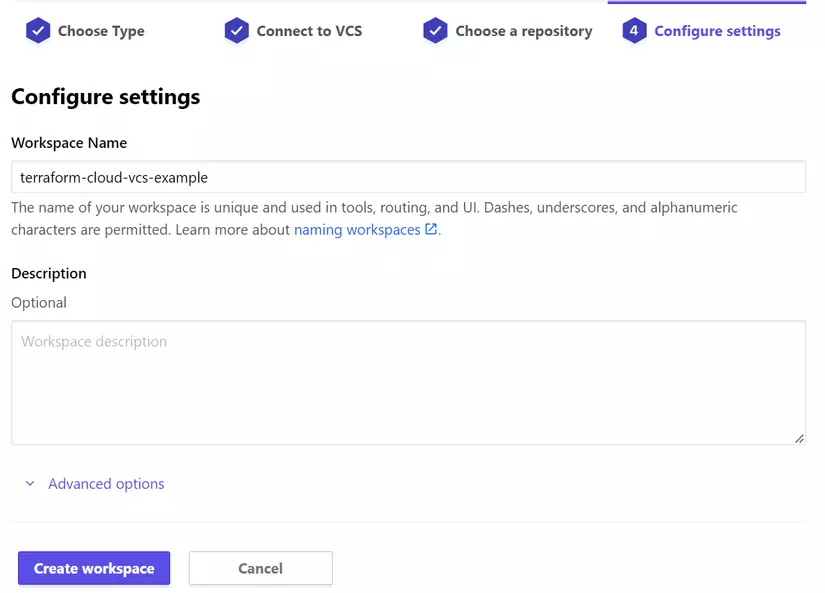
Next, enter the Workspace Name and click create workspace.
Wait a moment and we’ll see the workspace display Configuration uploaded successfully.
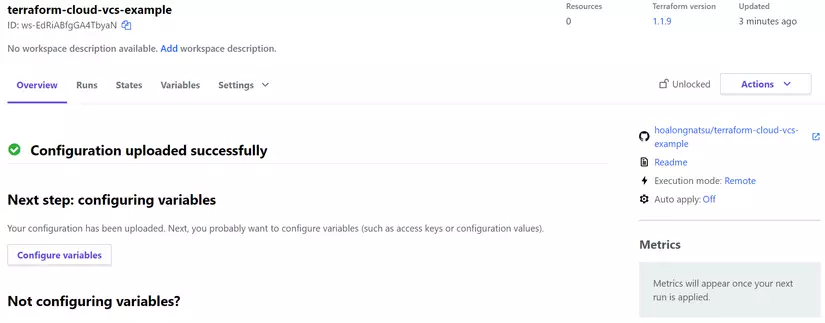
So we’ve created the workspace. Now we just write code and push it to GitHub. Terraform Cloud VCS runs and creates the infrastructure for us.
Performing CI/CD
Add the following 3 files to the repository.
terraform {
  required_version = ">= 1.9"

  required_providers {
    aws = {
      source  = "hashicorp/aws"
      version = "~> 6.0"
    }
  }
}
variable "region" {
  type    = string
  default = "us-west-2"
}
provider "aws" {
  region = var.region
}

data "aws_ami" "ami" {
  most_recent = true
  owners      = ["099720109477"]

  filter {
    name   = "name"
    values = ["ubuntu/images/hvm-ssd-gp3/ubuntu-noble-24.04-amd64-server-*"]
  }
}

resource "aws_instance" "ansible_server" {
  ami           = data.aws_ami.ami.id
  instance_type = "t3.micro"
}
Commit and push to GitHub.
git add .
git commit -m "init code"
git push
Back in the Terraform Cloud UI, click Actions and choose Start new run.
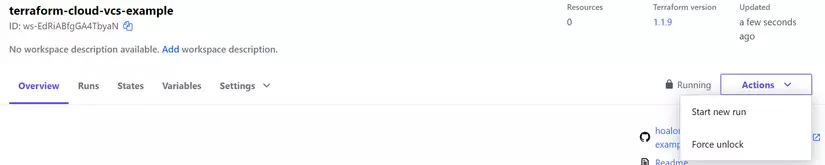
We’ll see Terraform Cloud execute the plan step. Instead of running the CLI command and seeing all our resources printed in the terminal, Terraform Cloud prints our resources on the UI very intuitively and clearly.
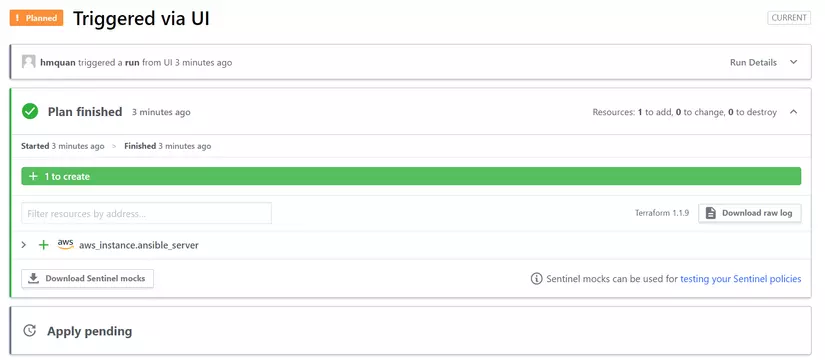
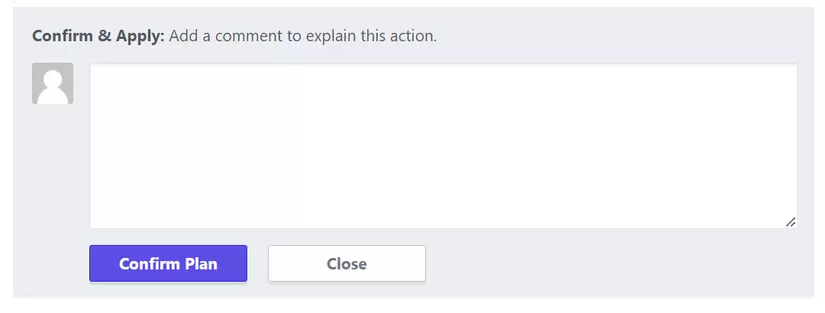
Scrolling down we’ll see a place to click apply. We can configure this step to be automatic, but for a production environment we should not allow it to auto apply. Click Confirm & Apply.

Enter a comment and click Confirm Plan.
Terraform Cloud executes the apply process.
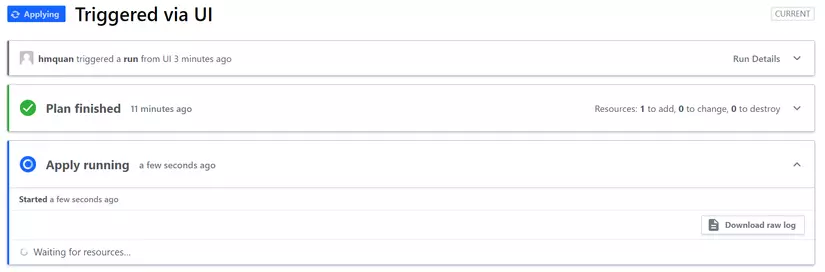
Wait for it to finish.
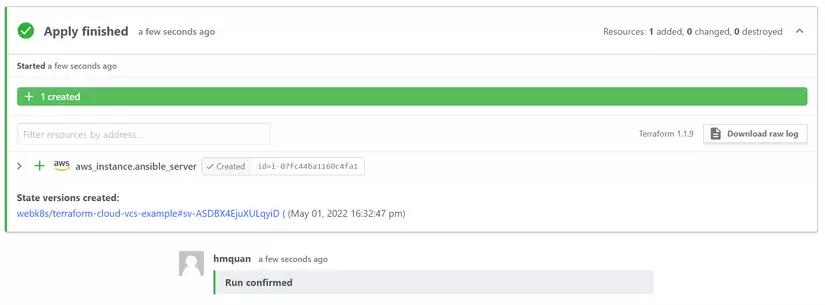
Now check the AWS Console and you’ll see the EC2 just created by Terraform Cloud.
Updating a resource
Update the EC2’s instance_type and push the code to GitHub again.
resource "aws_instance" "ansible_server" {
  ami           = data.aws_ami.ami.id
  instance_type = "t3.small" // t3.micro -> t3.small
}
git commit -am "update instance type"
git push
Now Terraform Cloud automatically detects that our code has changed and re-executes the plan step.
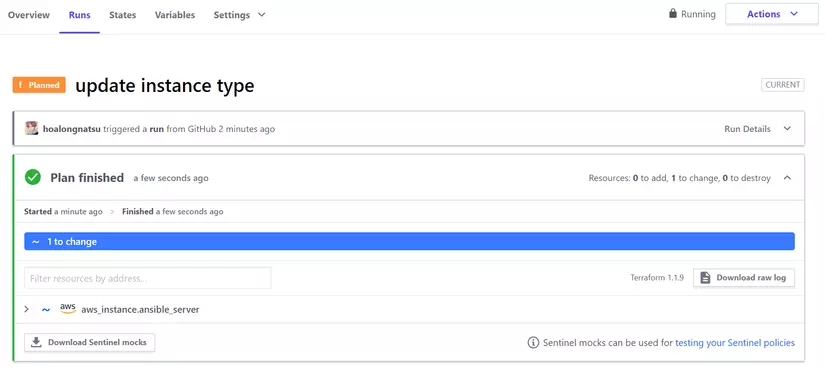
Click Confirm & Apply.
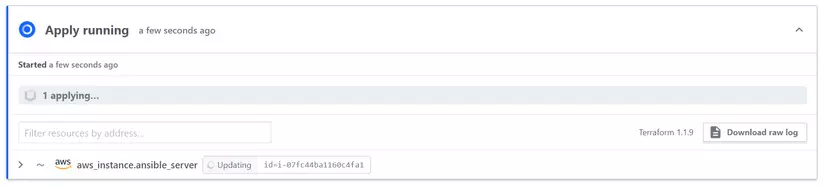
After it finishes, we’ll see the EC2 updated with the new instance type.
Deleting a resource
With Terraform Cloud, deleting resources is fairly simple. Click Settings and choose Destruction and Deletion.
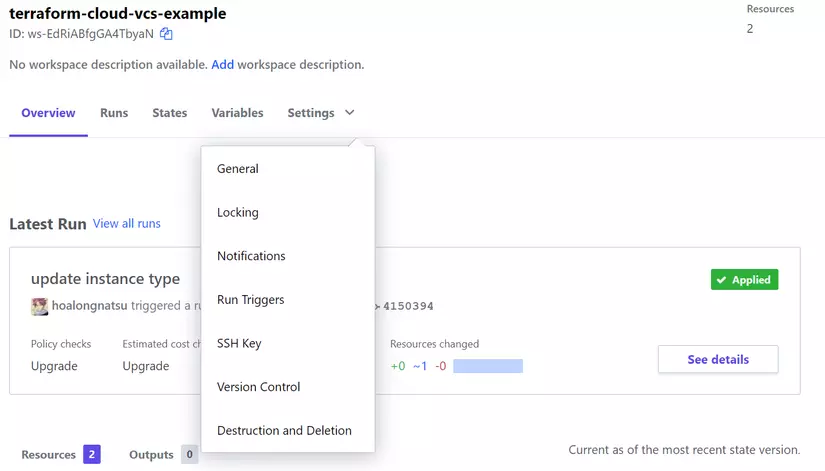
Then choose Delete from Terraform Cloud.
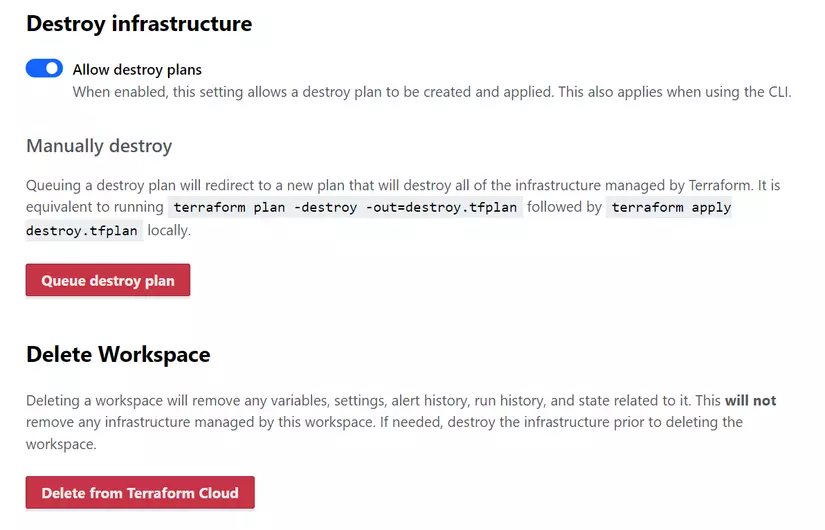
Enter the name.
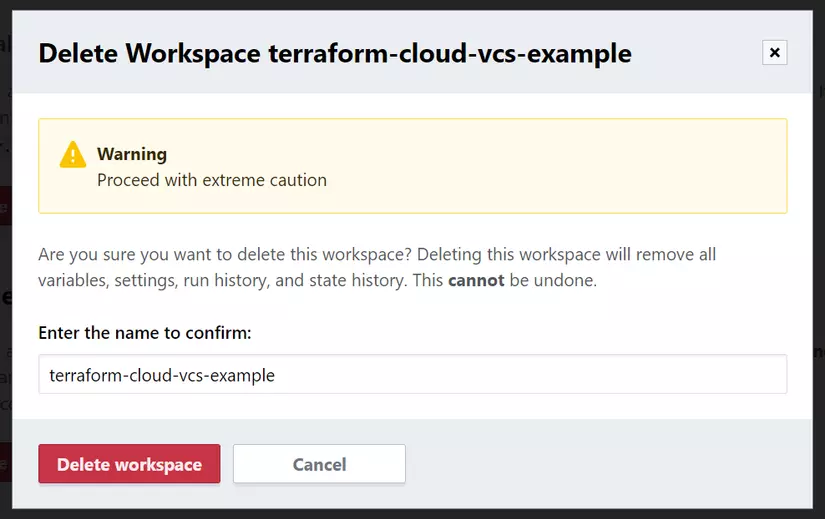
If you click Delete workspace, our resources are deleted. But don’t delete it just yet — we’ll keep it for the next example.
Zero-downtime deployment
For an EC2, when we change the ami value.
resource "aws_instance" "ansible_server" {
  ami           = data.aws_ami.ami.id // change here
  instance_type = "t3.small"
}
Because the EC2’s ami is a force-new attribute, when we run apply the current EC2 is deleted and a new one is created. This is Terraform’s default behavior for resources whose force-new attributes change. This can cause our system to be down for a period of time.

To avoid the system going down in this case, Terraform provides a Meta Argument named create_before_destroy.
Using create_before_destroy
This is a Meta Argument that helps us perform zero-downtime deployment when we change a resource’s force-new attributes.
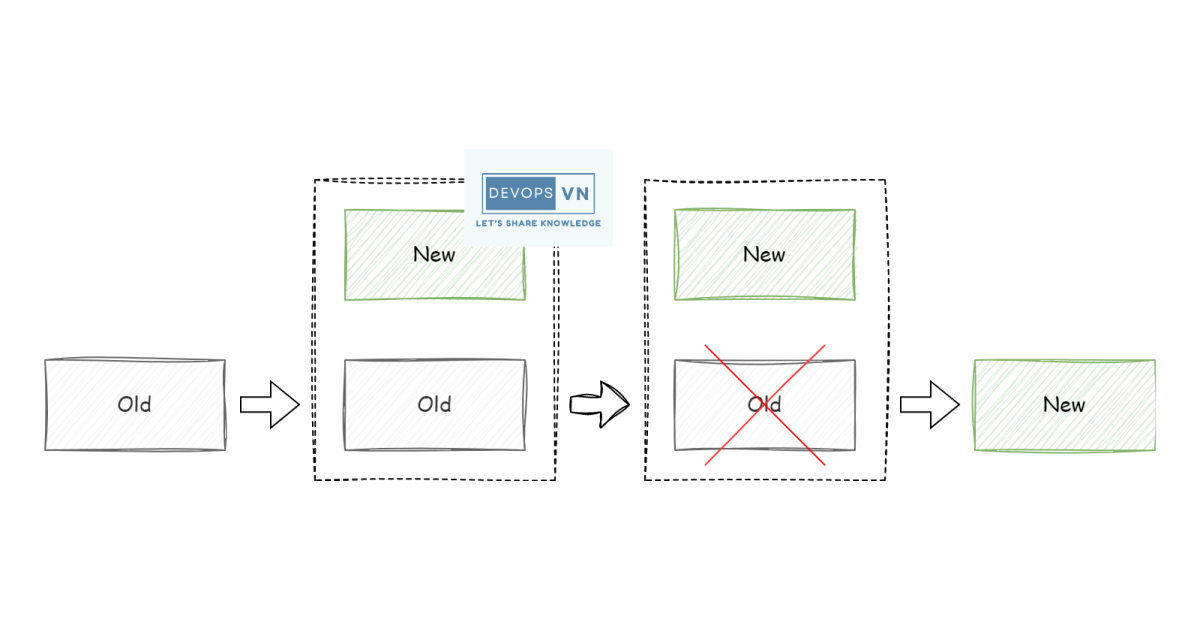
Instead of Terraform acting by default — deleting the resource first and then creating the new one — Terraform does the reverse: it creates the resource first, checks that it’s been created, and only then deletes the old resource.
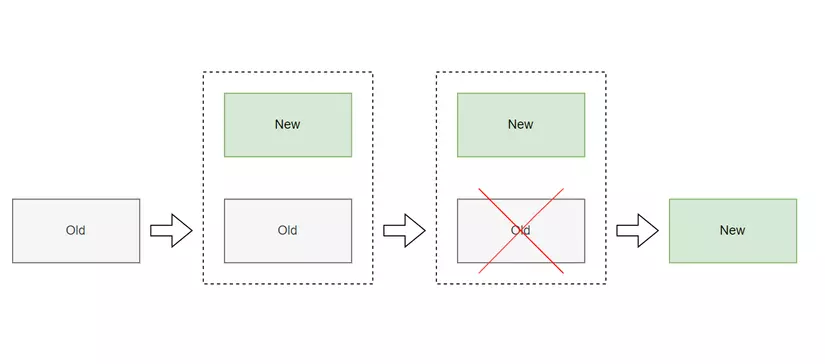
We use the create_before_destroy attribute as follows; update main.tf.
resource "aws_instance" "ansible_server" {
  ami           = data.aws_ami.ami.id
  instance_type = "t3.small"

  lifecycle {
    create_before_destroy = true
  }
}
We add a lifecycle attribute, in which we declare create_before_destroy as true. Now commit and push the code to GitHub, click Confirm for Terraform Cloud to run apply, and observe the EC2 in the AWS Console — we’ll see a new EC2 created first and only then the old one deleted.
Note
The create_before_destroy attribute can be very convenient, but we need to note that we can’t always use it, because it can cause conflicts.
For example, on AWS an S3 bucket’s name is unique across all of AWS, so if we use create_before_destroy with S3 it will fail, because the new S3 bucket is created first but its name is exactly the same as the old one — which immediately causes an error.
For that reason, we need to consider carefully when using create_before_destroy; we must clearly determine which resources we can use it with and which we can’t.
There’s no such thing as true zero-downtime
Although it’s called zero-downtime deployment, we can’t always achieve it, because zero-downtime deployment is a complex problem and only applies to certain resources.
For example, AWS’s database service RDS — when we change its instance_type, we can’t use create_before_destroy, because in this case RDS just updates the instance_type rather than deleting and recreating.
Of course, there are ways to perform zero-downtime deployment for a database, but the process is very complex and requires combining many different tools, not just Terraform.
In the next part I’ll discuss a concept that can help us perform zero-downtime deployment for a database: Blue/Green Deployment.
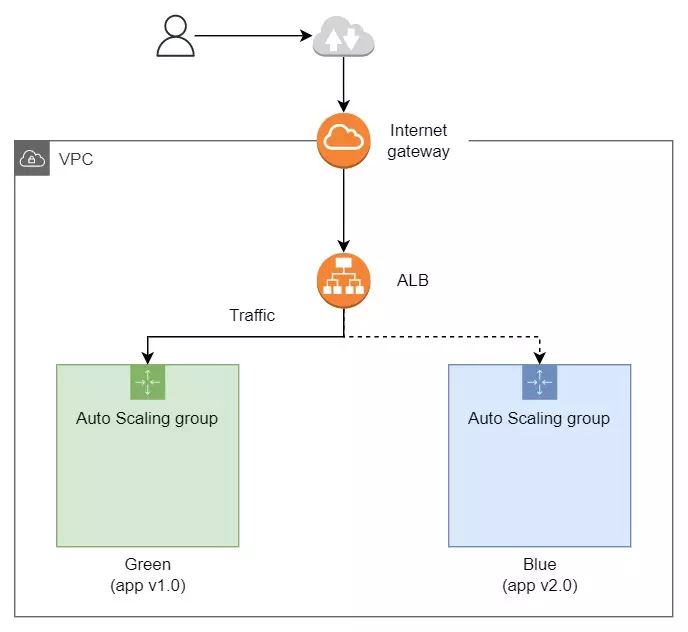
Conclusion
So we’ve learned how to perform CI/CD with Terraform Cloud, and a simple way to perform zero-downtime deployment. In the next part we’ll learn about Blue/Green Deployment.