In the previous part we learned how to initialize a project directory and write Terraform configuration files. In this part we’ll learn about the lifecycle of a resource in Terraform — what steps it goes through from when it is created until it is deleted.
We’ll use Terraform to create an S3 (AWS Simple Cloud Storage) bucket on AWS to learn about a resource’s lifecycle.
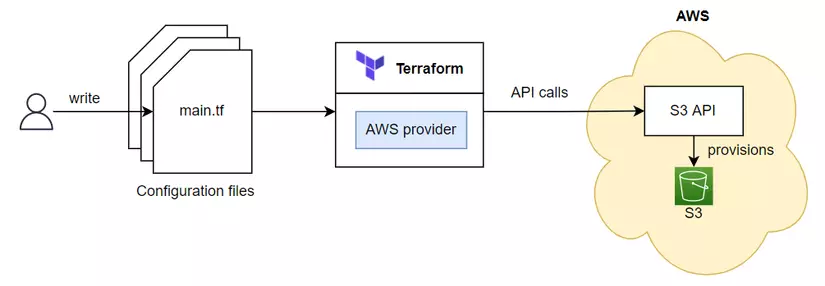
The functions Terraform calls during a lifecycle
Every Terraform resource type implements a CRUD interface. This CRUD interface has the functions Create(), Read(), Update(), and Delete(), and these functions are executed when the right conditions are met. A Terraform data type, on the other hand, implements a Read interface with only one function, Read(), as illustrated.
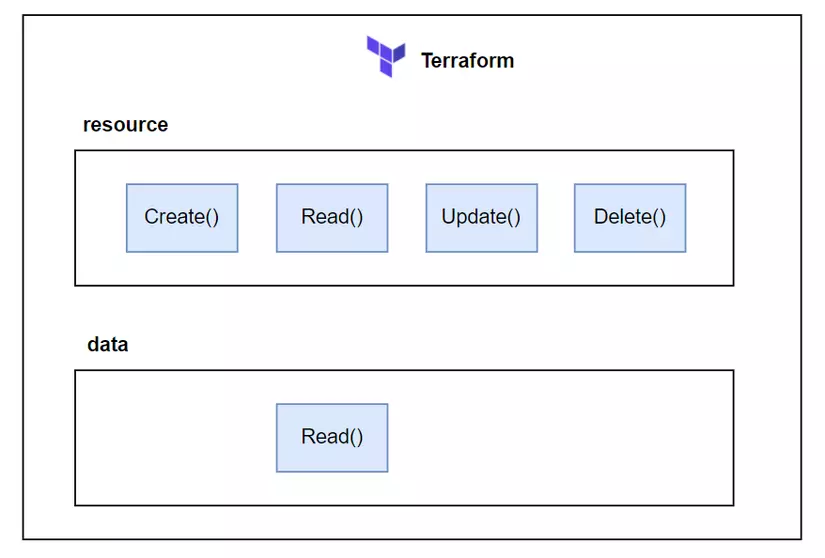
Create() is called during resource creation, Read() is called during plan, Update() is called during a resource update, and Delete() is called during resource deletion.
S3 example
Now we’ll write a Terraform file to create an S3 bucket and walk through each of the functions above. Create a workspace named s3, then create a file named main.tf with the following code:
terraform {
  required_version = ">= 1.9"

  required_providers {
    aws = {
      source  = "hashicorp/aws"
      version = "~> 6.0"
    }
  }
}

provider "aws" {
  region = "us-west-2"
}

resource "aws_s3_bucket" "terraform-bucket" {
  bucket = "terraform-series-bucket"

  tags = {
    Name = "Terraform Series"
  }
}
In the file above we use the aws_s3_bucket resource — the resource used to create an S3 Bucket on AWS Cloud — where the bucket field is our bucket’s name. After writing it, we run init so Terraform downloads the provider into the current workspace.
terraform init
Plan
As mentioned in the previous part, before creating resources we should run terraform plan first to see which resources will be created.
Besides showing which resources will be created, if we already have a resource and change a value in the Terraform file, plan shows which resources will be updated based on the previously created resource’s state.
And if we don’t change anything in the Terraform file, running plan shows that no resources will be added or updated.
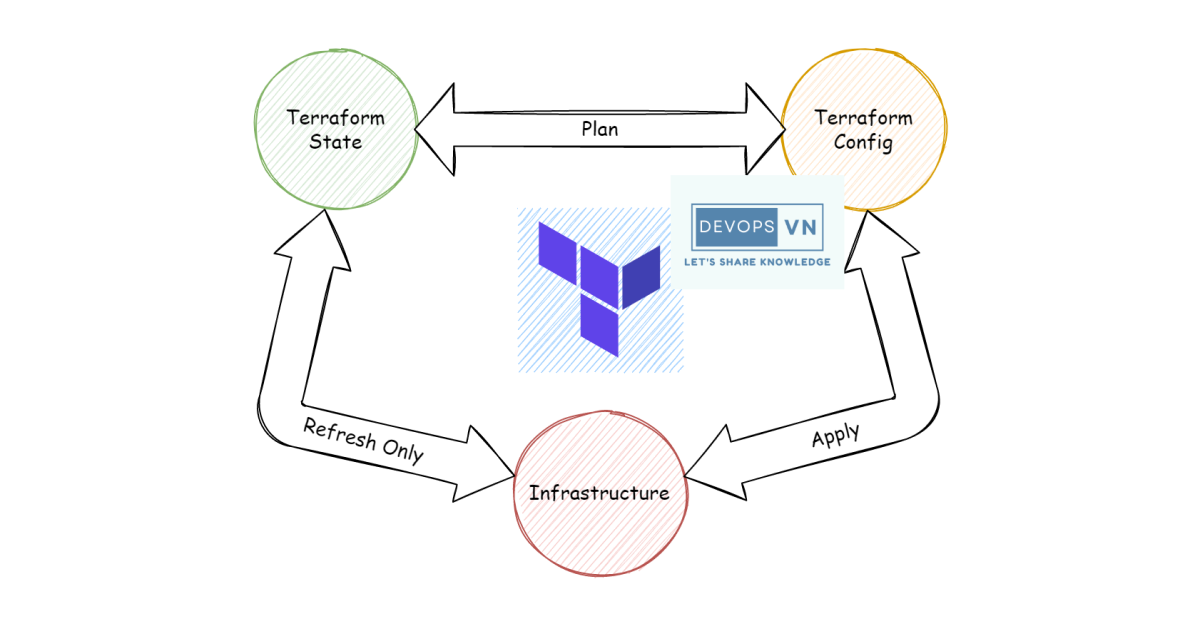
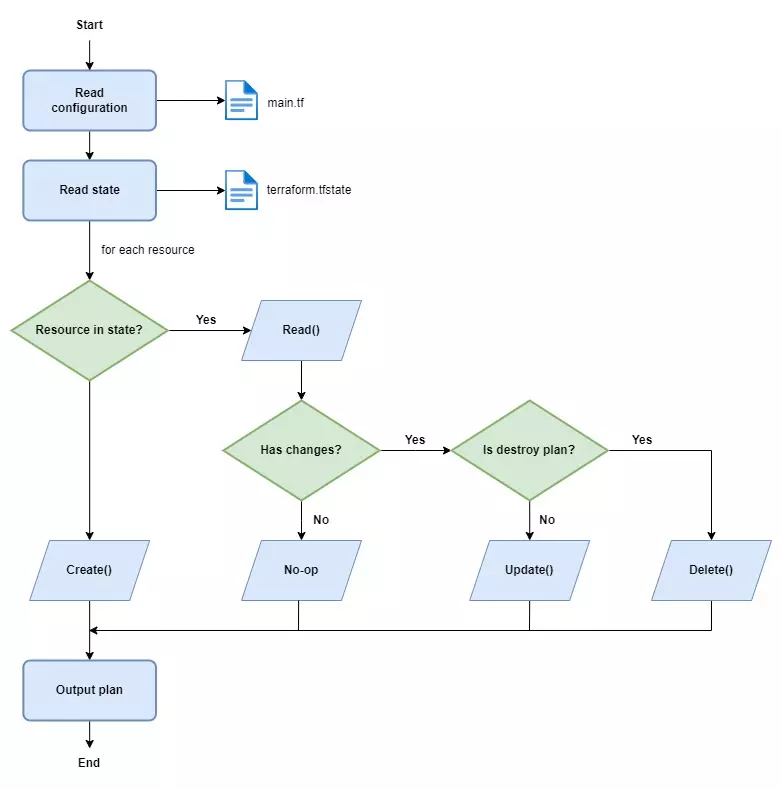
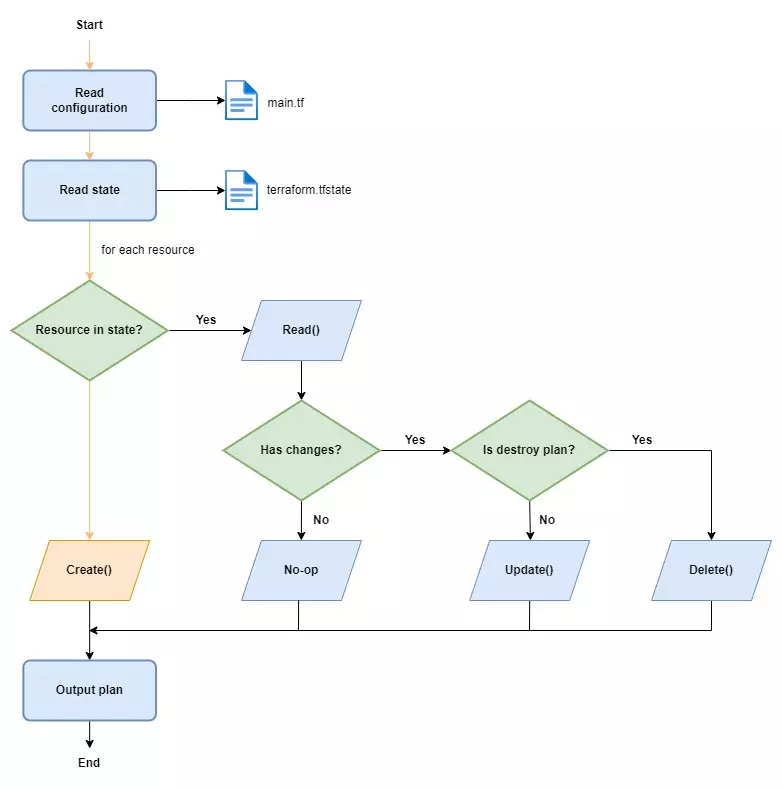
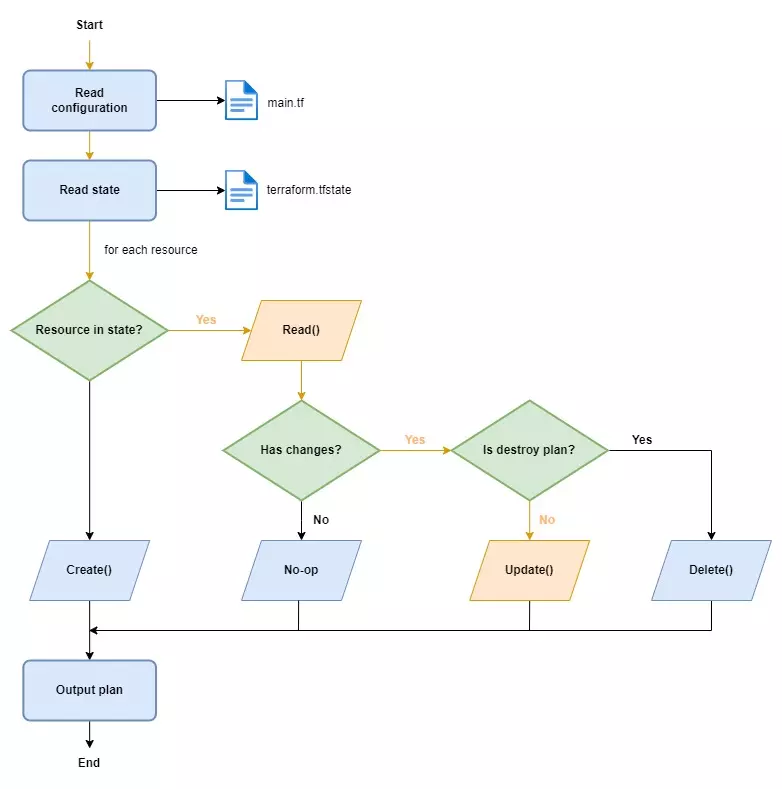
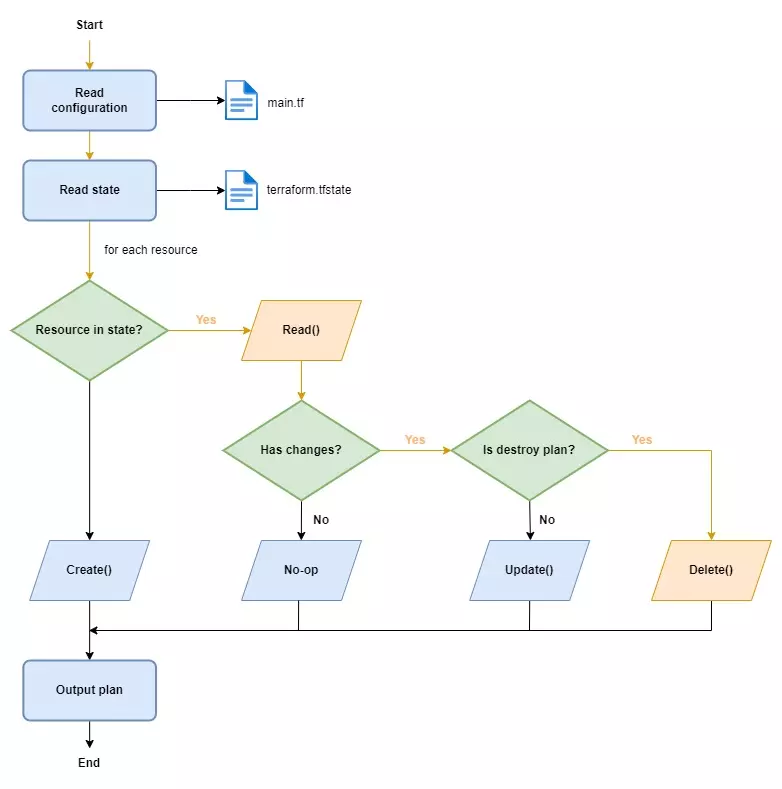
The plan process prints very useful results — just by reading what plan outputs, we’ll know what our infrastructure’s resources will look like. When we run plan, Terraform performs 3 main steps (if you’re going to interviews, read this plan section carefully):
- Read the configuration file and the state file — Terraform reads your configuration file and the state file (if one exists) first to get information about resources.
- Determine which actions to perform — Terraform computes which action to execute, which may be
Create(),Read(),Update(),Delete(), or nothing at all(No-op). - Output
An illustration of the plan process:
Creating the S3
Now we run apply to create the S3 on AWS. When we run apply there’s an extra confirmation step that forces us to enter yes; if you want to skip confirmation, add the -auto-approve attribute.
terraform apply -auto-approve
Terraform used the selected providers to generate the following execution plan. Resource actions are indicated with the
following symbols:
  + create

Terraform will perform the following actions:

  # aws_s3_bucket.terraform-bucket will be created
  + resource "aws_s3_bucket" "terraform-bucket" {
  ...
  }

Plan: 1 to add, 0 to change, 0 to destroy.
aws_s3_bucket.terraform-bucket: Creating...
aws_s3_bucket.terraform-bucket: Still creating... [10s elapsed]
aws_s3_bucket.terraform-bucket: Creation complete after 15s [id=terraform-series-bucket]

Apply complete! Resources: 1 added, 0 changed, 0 destroyed.
After we finish running apply, Terraform creates a file named terraform.tfstate; if you open it you’ll see the S3’s information. Open the AWS Web Console and you’ll see our S3 bucket has been created.
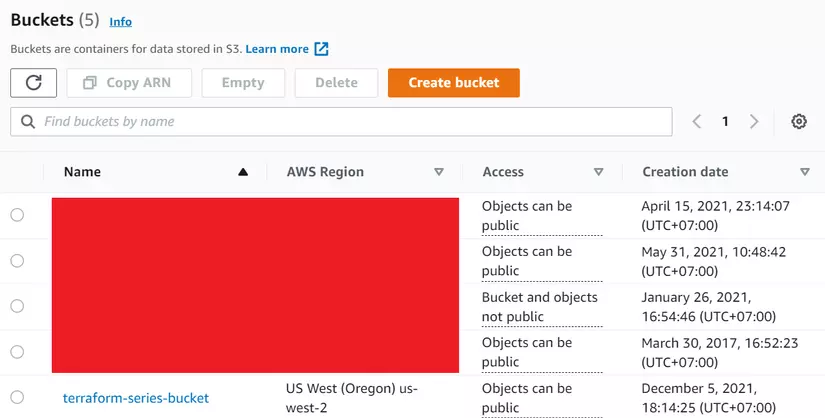
How did Terraform create this S3 bucket? During apply, Terraform calls the Create() function of the aws_s3_bucket resource.
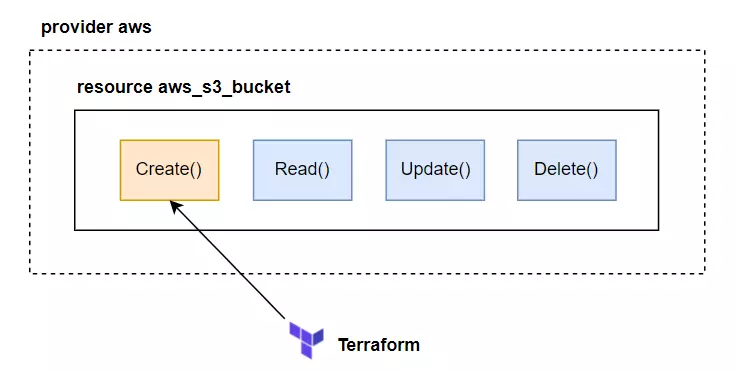
The Create() function above contains code to call the AWS API to create the S3 bucket, so when Terraform calls this function the S3 bucket is created, as illustrated below.
No-op
Once we’ve created the resource, if we don’t change anything, running plan makes Terraform go through the No-op step. Now if we run plan, Terraform first reads our configuration file, then detects the state file and reads it, as illustrated below.
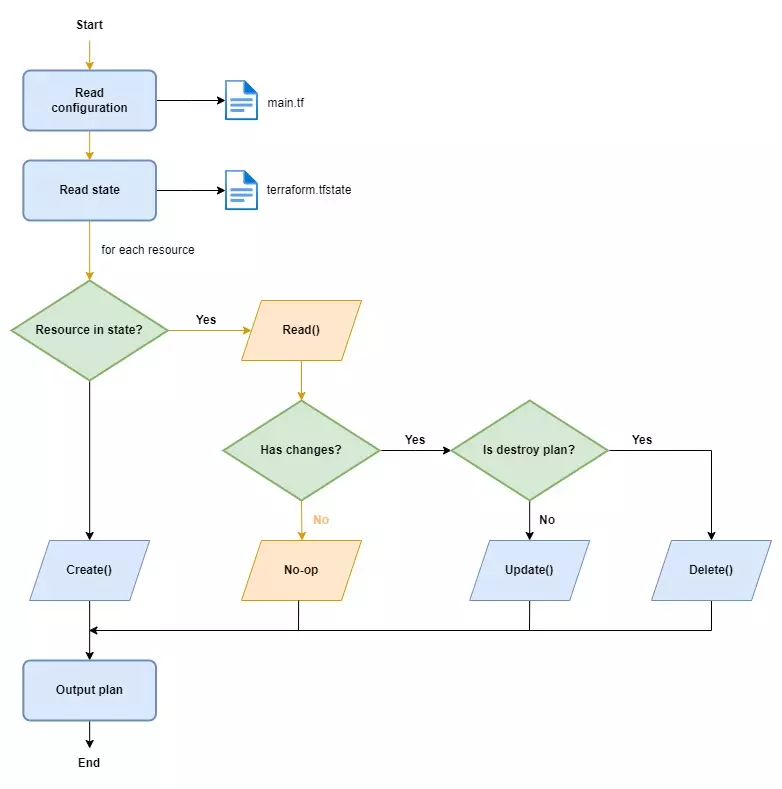
After reading the state file, Terraform checks whether the S3 bucket exists in the state file; if it does, Terraform executes the Read() function of the aws_s3_bucket resource.
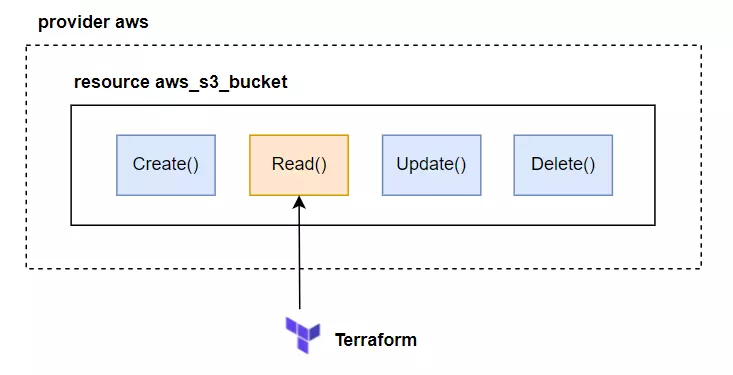
Read() contains code to call the AWS API and read the current S3 bucket’s information, then compares it with the S3 in the state file. If nothing has changed, Read() returns that nothing has changed, and Terraform performs no action.
Updating the S3
Terraform has no update command — we just edit the configuration file and run apply again, and Terraform determines whether to update the resource. Let’s change the S3 bucket’s name.
provider "aws" {
  region = "us-west-2"
}

resource "aws_s3_bucket" "terraform-bucket" {
  bucket = "terraform-series-bucket-update"

  tags = {
    Name        = "Terraform Series"
  }
}
Then we run plan again.
terraform plan
aws_s3_bucket.terraform-bucket: Refreshing state... [id=terraform-series-bucket]

Terraform used the selected providers to generate the following execution plan. Resource actions are indicated with the
following symbols:
-/+ destroy and then create replacement

Terraform will perform the following actions:

  # aws_s3_bucket.terraform-bucket must be replaced
-/+ resource "aws_s3_bucket" "terraform-bucket" {
      + acceleration_status         = (known after apply)
      ~ arn                         = "arn:aws:s3:::terraform-series-bucket" -> (known after apply)
      ...
    }

Plan: 1 to add, 0 to change, 1 to destroy.

───────────────────────────────────────────────────────────────────────────────

Note: You didn't use the -out option to save this plan, so Terraform can't guarantee to take exactly these actions if you
run "terraform apply" now.
You’ll see our S3 bucket will be updated by Terraform by deleting and recreating it. That is, Terraform first deletes the old S3 bucket, then recreates a new one with a different name. Why is that? Because the bucket field in the aws_s3_bucket resource is a Force New attribute.
In Terraform, resources have two kinds of attributes: Force New and Normal Update:
- Force New: the resource is deleted and recreated — delete the old resource first, then create the new one.
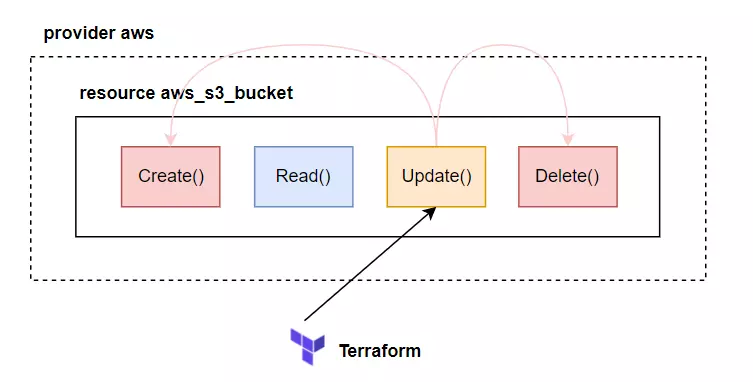
- Normal Update: the resource is updated normally, without needing to delete the old resource.
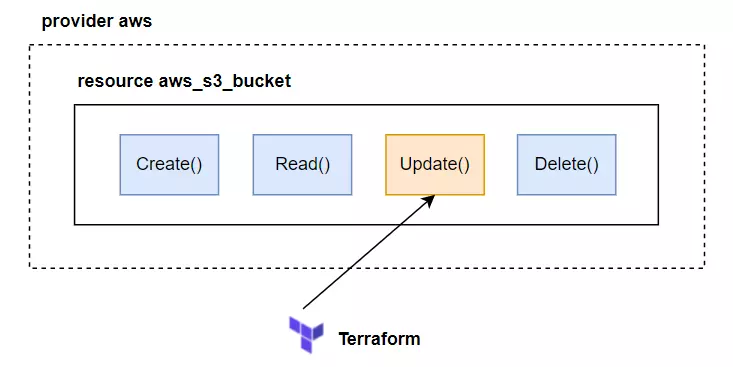
Which kind an attribute is depends on the provider. Above, because we changed a Force New attribute of aws_s3_bucket, it is deleted and recreated. Since deleting and recreating can cause many problems, we should run plan to determine why our resource behaves this way — remember, always run plan first.
Since our S3 bucket is newly created and has nothing in it, we just run terraform apply to update it normally.
terraform apply -auto-approve
aws_s3_bucket.terraform-bucket: Refreshing state... [id=terraform-series-bucket]

Terraform used the selected providers to generate the following execution plan. Resource actions are indicated with the
following symbols:
-/+ destroy and then create replacement

Terraform will perform the following actions:

 # aws_s3_bucket.terraform-bucket must be replaced
-/+ resource "aws_s3_bucket" "terraform-bucket" {
     + acceleration_status         = (known after apply)
     ~ arn                         = "arn:aws:s3:::terraform-series-bucket" -> (known after apply)
     ...
   }

Plan: 1 to add, 0 to change, 1 to destroy.
aws_s3_bucket.terraform-bucket: Destroying... [id=terraform-series-bucket]
aws_s3_bucket.terraform-bucket: Destruction complete after 1s
aws_s3_bucket.terraform-bucket: Creating...
aws_s3_bucket.terraform-bucket: Still creating... [10s elapsed]
aws_s3_bucket.terraform-bucket: Creation complete after 15s [id=terraform-series-bucket-update]

Apply complete! Resources: 1 added, 0 changed, 1 destroyed.
After it finishes, you’ll see the S3 bucket with the new name has been created.
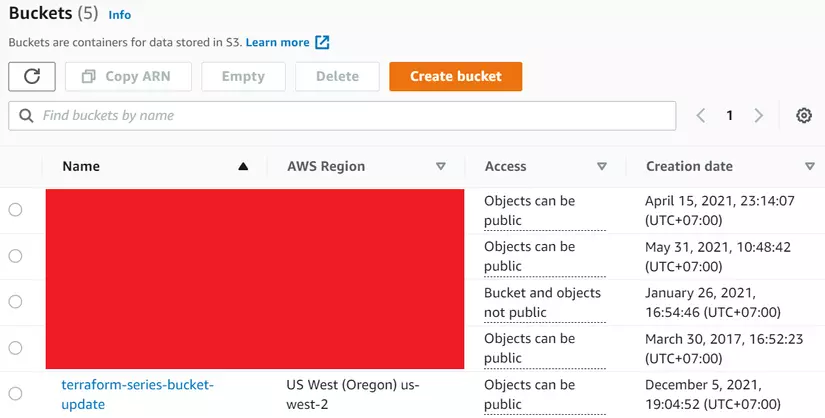
Illustrated:
Deleting the S3
We delete a resource with the destroy command. Like apply, we can skip the confirmation step by passing the -auto-approve attribute.
terraform destroy -auto-approve
aws_s3_bucket.terraform-bucket: Refreshing state... [id=terraform-series-bucket-update]

Terraform used the selected providers to generate the following execution plan. Resource actions are indicated with the
following symbols:
 - destroy

Terraform will perform the following actions:

 # aws_s3_bucket.terraform-bucket will be destroyed
 - resource "aws_s3_bucket" "terraform-bucket" {
     - arn                         = "arn:aws:s3:::terraform-series-bucket-update" -> null
     ...
   }

Plan: 0 to add, 0 to change, 1 to destroy.
aws_s3_bucket.terraform-bucket: Destroying... [id=terraform-series-bucket-update]
aws_s3_bucket.terraform-bucket: Destruction complete after 1s

Destroy complete! Resources: 1 destroyed.
When we run destroy, it reads our state file to see whether that resource exists; if it does, it executes the Delete() function of the aws_s3_bucket resource.
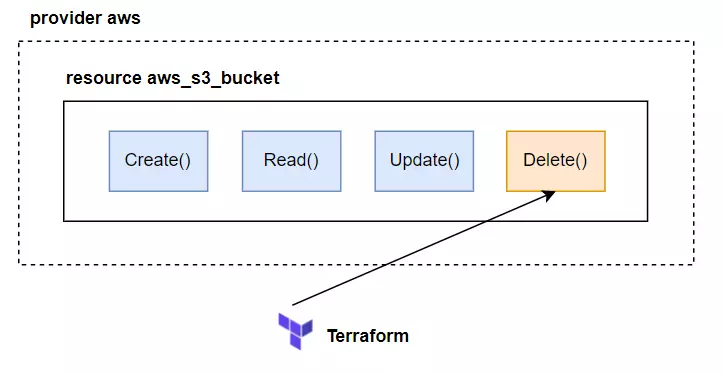
Illustrated:
After we finish running destroy, our workspace looks like this:
.
├── main.tf
├── terraform.tfstate
└── terraform.tfstate.backup
We see an extra file, terraform.tfstate.backup; this is mainly so we can review the resources’ previous state.
When we delete all the configuration in the Terraform file and run
apply, it’s equivalent to runningdestroy.
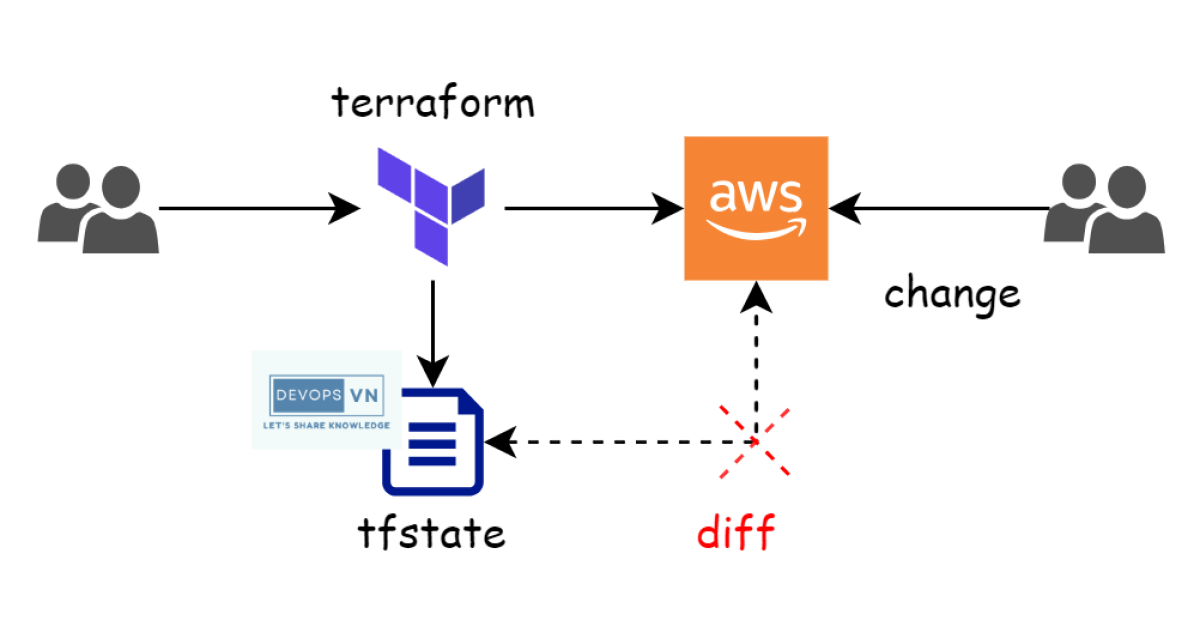
We’ve finished discussing the lifecycle of a resource in Terraform. Now let’s discuss a very common issue: what if someone changes the configuration of our resource outside of Terraform? How does Terraform handle that?
Resource Drift
Resource Drift is the issue where our resource’s configuration is changed outside of Terraform — with AWS this might be someone using the Web Console to change some configuration of a resource we created with Terraform. Reusing the example above, we recreate the S3.
provider "aws" {
  region = "us-west-2"
}

resource "aws_s3_bucket" "terraform-bucket" {
  bucket = "terraform-series-bucket-update"

  tags = {
    Name        = "Terraform Series"
  }
}
terraform apply -auto-approve
...
Plan: 1 to add, 0 to change, 0 to destroy.
aws_s3_bucket.terraform-bucket: Creating...
aws_s3_bucket.terraform-bucket: Still creating... [10s elapsed]
aws_s3_bucket.terraform-bucket: Creation complete after 15s [id=terraform-series-bucket-update]

Apply complete! Resources: 1 added, 0 changed, 0 destroyed.
Then we go to the AWS Web Console and change the tags field of the S3 bucket.

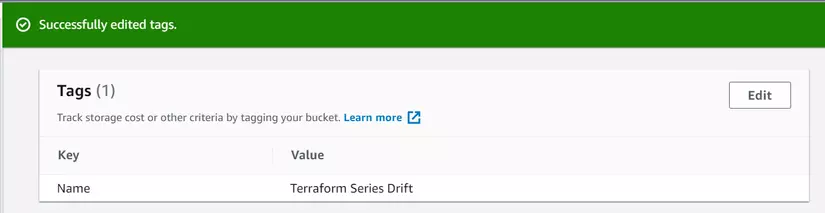
Terraform doesn’t automatically detect and update our Terraform file — it’s not that magical. But when we run apply, it detects the change and updates the tags field that we changed outside Terraform back to match the tags we wrote in the configuration file. Run plan first to see.
terraform plan
aws_s3_bucket.terraform-bucket: Refreshing state... [id=terraform-series-bucket-update]

Note: Objects have changed outside of Terraform

Terraform detected the following changes made outside of Terraform since the last "terraform apply":

  # aws_s3_bucket.terraform-bucket has been changed
  ~ resource "aws_s3_bucket" "terraform-bucket" {
        id                          = "terraform-series-bucket-update"
      ~ tags                        = {
          ~ "Name" = "Terraform Series" -> "Terraform Series Drift"
        }
      ~ tags_all                    = {
          ~ "Name" = "Terraform Series" -> "Terraform Series Drift"
        }
        # (9 unchanged attributes hidden)

        # (1 unchanged block hidden)
    }

...

Terraform used the selected providers to generate the following execution plan. Resource actions are indicated with the
following symbols:
  ~ update in-place

Terraform will perform the following actions:

  # aws_s3_bucket.terraform-bucket will be updated in-place
  ~ resource "aws_s3_bucket" "terraform-bucket" {
        id                          = "terraform-series-bucket-update"
      ~ tags                        = {
          ~ "Name" = "Terraform Series Drift" -> "Terraform Series"
        }
      ~ tags_all                    = {
          ~ "Name" = "Terraform Series Drift" -> "Terraform Series"
        }
        # (9 unchanged attributes hidden)

        # (1 unchanged block hidden)
    }

Plan: 0 to add, 1 to change, 0 to destroy.

───────────────────────────────────────────────────────────────────────────────

Note: You didn't use the -out option to save this plan, so Terraform can't guarantee to take exactly these actions if you
run "terraform apply" now.
Running apply again, we’ll see the tags are updated back to the original.
terraform apply -auto-approve
...
Plan: 0 to add, 1 to change, 0 to destroy.
aws_s3_bucket.terraform-bucket: Modifying... [id=terraform-series-bucket-update]
aws_s3_bucket.terraform-bucket: Still modifying... [id=terraform-series-bucket-update, 10s elapsed]
aws_s3_bucket.terraform-bucket: Modifications complete after 13s [id=terraform-series-bucket-update]

Apply complete! Resources: 0 added, 1 changed, 0 destroyed.

We’ll discuss Resource Drift in more detail in another part.
Conclusion
So we’ve finished learning about the lifecycle of a resource in Terraform. In the next part we’ll learn about functional programming inside Terraform.