Welcome to the journey of mastering Terraform. In this first part we’ll learn what IaC (Infrastructure as Code) is, what Terraform is, and why we need it.
Infrastructure as Code
From the name Infrastructure as Code, we can simply understand it as writing code to describe and provision our infrastructure. “Infrastructure” here means the infrastructure of a system — servers, networking, gateways, databases, everything needed to deploy our application in a server environment. Infrastructure as Code is best suited to infrastructure on the cloud.
For example, on AWS Cloud, normally we log into the Web Console, and when we need a virtual machine we click around the console to create one (EC2); when we need a database, we click around the web to create a database. Over time, our system’s infrastructure grows, and this is where problems appear. We won’t know what our current system consists of — and even if we remember, what happens if the person managing the cloud leaves and a new person joins? How will they know the current infrastructure? Furthermore, what if someone accidentally deletes our EC2? We’d have to recreate it by hand, but we don’t remember the configuration the old EC2 was created with. Even with notes, recreating it takes a lot of time. And what if the entire cloud infrastructure dies? Do we have to rebuild the whole system infrastructure from scratch? IaC solves all these problems: we write code to describe and back up our infrastructure, so that if anything happens — the whole infrastructure dies, or someone changes something wrong — we can easily redeploy it.
Terraform
In the IaC space, the most popular tool at the moment is Terraform. Terraform is developed by HashiCorp and is used to provision infrastructure. We just write code, run a few simple commands, and it creates the infrastructure for us, instead of clicking around the Web Console, which is very time-consuming.
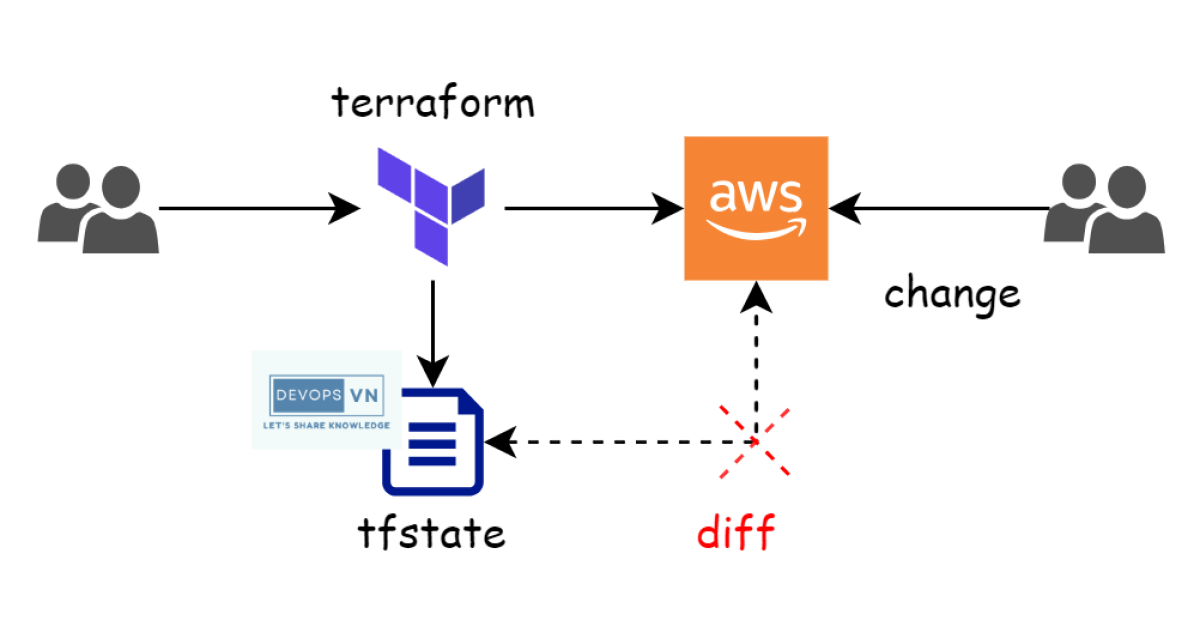
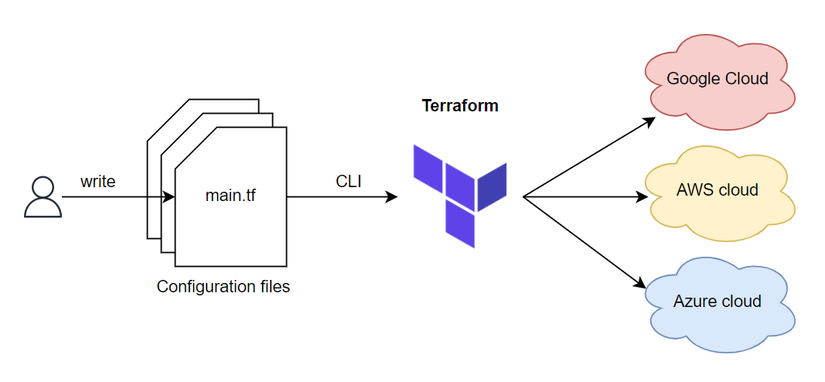
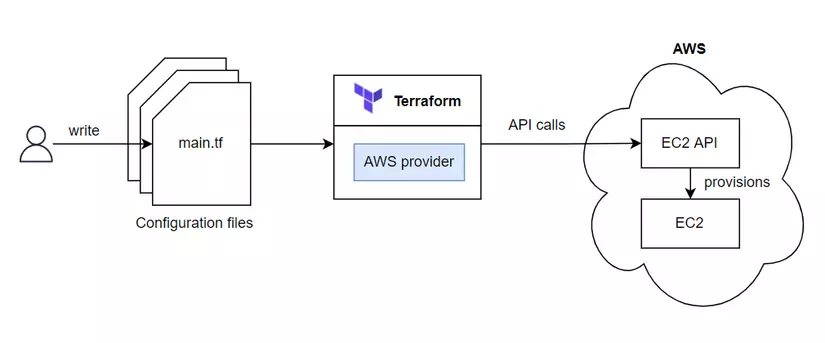
The Terraform flow is as follows: we write code, run a command, and wait for Terraform to provision the infrastructure. After Terraform finishes, it creates a file called the Terraform State to record the current infrastructure architecture.
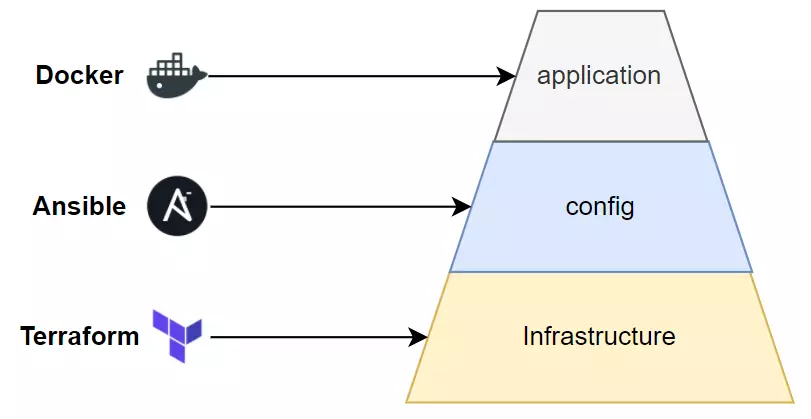
There are other tools that can do this too, such as Ansible. But Ansible is a tool built for Configuration — it wasn’t created to focus on IaC — so using Ansible for this would waste effort running unnecessary things.
To deploy an application, we can follow this entire flow: use Terraform to create the infrastructure, then use Ansible to configure what the server needs, such as installing Docker, configuring CI tools on the server, and so on. Then we use Docker or Kubernetes to run the application.
Why use Terraform
Four advantages of Terraform over other tools:
- Easy to use
- Open source and free
- Declarative programming: you only describe what you need and Terraform does it for you
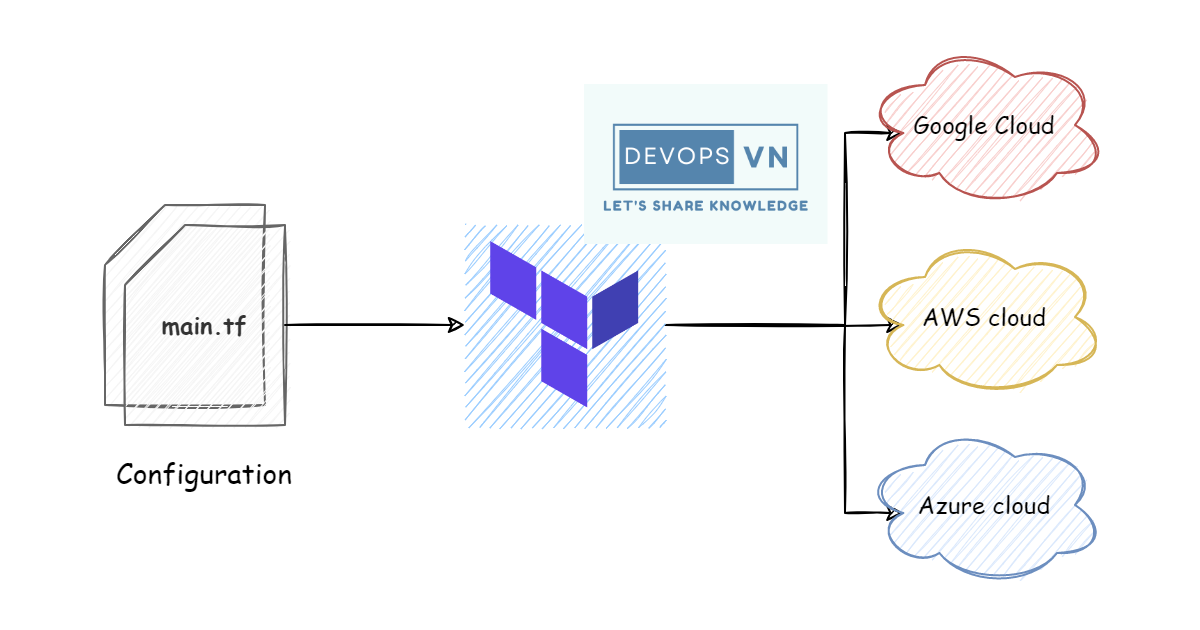
- Can provision infrastructure for many different clouds such as AWS, GCP, and Azure in the same configuration file (Cloud-Agnostic)
Next, let’s do a small example to understand it better. In this series I’ll use Terraform to provision infrastructure on AWS (since I haven’t used other clouds yet).
To do this you need an AWS account and an IAM User (or, better, an IAM Identity Center / SSO user) with Admin permissions. The simplest way to configure credentials is the AWS CLI:
aws configure
This writes your Access Key and Secret Access Key to ~/.aws/credentials:
[default]
aws_access_key_id=<your-key>
aws_secret_access_key=<your-key>
In real projects prefer short-lived credentials over long-lived access keys — for example
aws sso loginwith IAM Identity Center, or an IAM role. Terraform picks up whatever the AWS CLI is configured to use.
Then install Terraform by following the official guide: Install Terraform. This series uses Terraform 1.9+ and the AWS provider v6. OK, next we start writing code.
“Hello Terraform!”
In this example we’ll use Terraform to create an EC2 instance on AWS Cloud. The language Terraform uses is called HashiCorp Configuration Language (HCL).
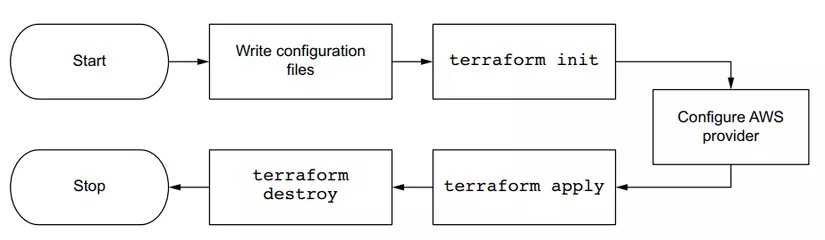
The steps we perform are:
- Write the Terraform file
- Configure the AWS Provider
- Initialize Terraform with the
terraform initcommand - Deploy the EC2 Instance with the
terraform applycommand - Delete the EC2 with the
terraform destroycommand
Create a file named main.tf. We start with a terraform block that pins the versions we depend on, then configure the AWS provider:
terraform {
  required_version = ">= 1.9"

  required_providers {
    aws = {
      source  = "hashicorp/aws"
      version = "~> 6.0"
    }
  }
}

provider "aws" {
  region = "us-west-2"
}
The required_providers block tells Terraform exactly which provider to download and which version range is acceptable (~> 6.0 means any 6.x release). Pinning versions is a best practice — it keeps your team and CI reproducible. The provider block says our resources will be created in the us-west-2 region.
Then we add the code to create an EC2. Instead of hard-coding an AMI ID (which is region-specific and goes stale as new images are released), we look up the latest Amazon Linux 2023 image with a data source:
# Look up the latest Amazon Linux 2023 AMI owned by Amazon.
data "aws_ami" "al2023" {
  most_recent = true
  owners      = ["amazon"]

  filter {
    name   = "name"
    values = ["al2023-ami-2023.*-x86_64"]
  }

  filter {
    name   = "virtualization-type"
    values = ["hvm"]
  }
}

resource "aws_instance" "hello" {
  ami           = data.aws_ami.al2023.id
  instance_type = "t3.micro"

  tags = {
    Name = "HelloWorld"
  }
}
Above we use a block named resource — this is the most important block in Terraform; we use it to create our resources. After resource comes another value, the resource type we want to create (this depends on what resource types our provider offers), for example aws_instance above, and the final value is the name of that resource, which we can set to anything. We also switched to a current-generation instance type, t3.micro.
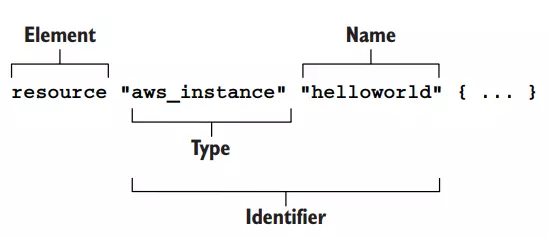
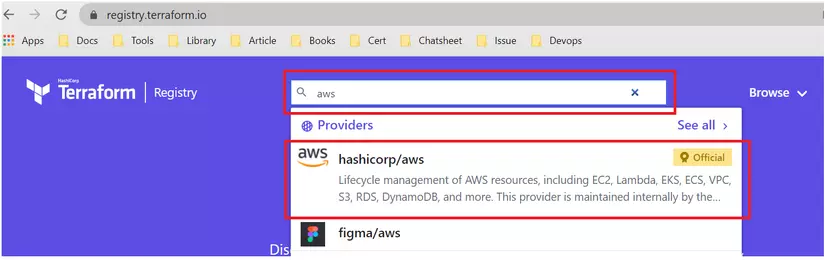
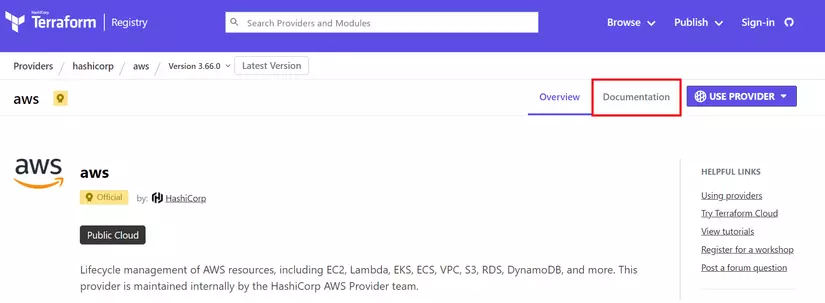
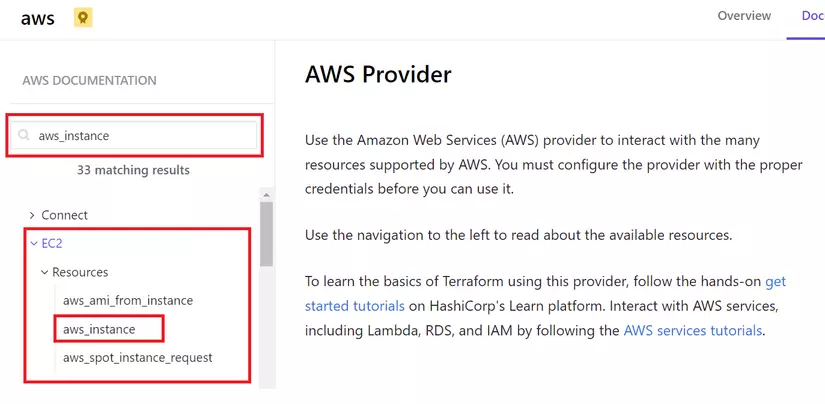
To see the attributes of a given resource, we go to the Terraform Registry. For example, here I need to see the attributes of the aws_instance for aws.
We click over to Documentation.
Search for aws_instance.
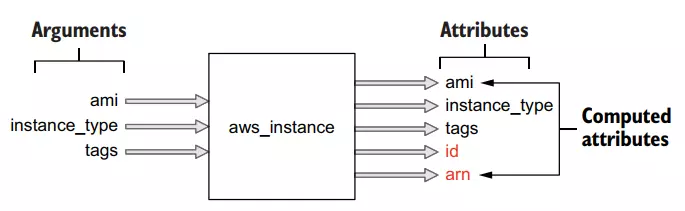
Each resource has arguments (inputs) and attributes (outputs) depending on the resource type, and the outputs include a kind called computed attributes, which are values we only know once the resource has been created.
Once we’ve finished writing the configuration, we open the terminal and run terraform init. This step is required when writing a configuration for new infrastructure — it downloads the provider’s code into the current directory containing the main.tf file.
terraform init
Initializing the backend...

Initializing provider plugins...
- Finding hashicorp/aws versions matching "~> 6.0"...
- Installing hashicorp/aws v6.55.0...
- Installed hashicorp/aws v6.55.0 (signed by HashiCorp)

Terraform has created a lock file .terraform.lock.hcl to record the provider
selections it made above. Include this file in your version control repository
so that Terraform can guarantee to make the same selections by default when
you run "terraform init" in the future.
After init finishes, we run the apply command to create the EC2:
terraform apply -auto-approve
Terraform used the selected providers to generate the following execution plan. Resource actions are indicated with the
following symbols:
  + create

Terraform will perform the following actions:

  # aws_instance.hello will be created
  + resource "aws_instance" "hello" {
      + ami                                  = "ami-09dd2e08d601bff67"
...
Plan: 1 to add, 0 to change, 0 to destroy.
aws_instance.hello: Creating...
aws_instance.hello: Still creating... [10s elapsed]
aws_instance.hello: Still creating... [20s elapsed]
...
Apply complete! Resources: 1 added, 0 changed, 0 destroyed.
After it finishes, we go to our Web Console and we’ll see the EC2 has been created.

Now if we want to delete the EC2, we just run the destroy command.
terraform destroy -auto-approve
aws_instance.hello: Refreshing state... [id=i-0ec68130272c45152]

Terraform used the selected providers to generate the following execution plan. Resource actions are indicated with the
following symbols:
  - destroy

Terraform will perform the following actions:

  # aws_instance.hello will be destroyed
  - resource "aws_instance" "hello" {
      - ami                                  = "ami-09dd2e08d601bff67" -> null
...
Plan: 0 to add, 0 to change, 1 to destroy.
aws_instance.hello: Destroying... [id=i-0ec68130272c45152]
aws_instance.hello: Still destroying... [id=i-0ec68130272c45152, 10s elapsed]
aws_instance.hello: Still destroying... [id=i-0ec68130272c45152, 20s elapsed]
aws_instance.hello: Still destroying... [id=i-0ec68130272c45152, 30s elapsed]
aws_instance.hello: Destruction complete after 35s

Destroy complete! Resources: 1 destroyed.
Back in the Web Console, we’ll see that our EC2 has been deleted successfully. So we’ve completed our first example with Terraform.
Conclusion
So we’ve learned what IaC is and how to use Terraform. As you can see, with Terraform we create and delete resources very easily. In the next part, I’ll go deeper into how to write configuration code.